3D Effects in Alight Motion | Complete Beginner to Pro Guide (2026)
The first time I opened Alight Motion on my phone, I had no idea you could pull off cinematic 3D animations on a screen this small. I was used to watching tutorials made on heavy desktop software, and honestly, mobile editing felt like a downgrade. Then I tried my first 3D text intro for a friend’s gaming channel, and that opinion flipped overnight. The result looked like something out of a movie trailer, and it was all done on a mid-range Android phone during a long bus ride.
This guide is built from that journey. I have spent the last three years using Alight Motion almost daily for client reels, AMV edits, and YouTube intros, and the 3D Effects in Alight Motion are honestly what makes this app stand apart from CapCut, KineMaster, and the rest. If you are starting from zero or you already edit a bit but your videos feel flat, you are in the right place.
By the end of this guide, you will know how to create depth, animate camera movements, build parallax scenes, design 3D text titles, and export everything in cinema-grade quality. I will walk you through every step the way I learned it, with the mistakes I made so you can skip them. Beginners, content creators, social media editors, and even seasoned video editors switching to mobile workflows will find something useful here.
What Are 3D Effects in Alight Motion?
Before we touch a single keyframe, let me clear up what we actually mean when we say 3D Effects in Alight Motion. The app does not have a true 3D engine like Blender or Cinema 4D. What it offers is a powerful set of pseudo-3D tools that simulate depth, perspective, and dimensional motion so convincingly that most viewers cannot tell the difference.
Understanding 3D Animation in Mobile Editing
On mobile, 3D animation works through smart layering, perspective shifts, and motion blur. Alight Motion gives you control over X, Y, and Z-axis transformations through its rotation and scale tools. When you combine these with keyframes, the brain reads the result as three-dimensional movement even though you are still working on a flat canvas.
How 3D Effects Improve Video Quality?
Flat edits scroll past. Edits with depth stop the thumb. That is the whole game on Instagram Reels, TikTok, and YouTube Shorts in 2026. Adding even subtle 3D motion to a thumbnail or intro increases watch time noticeably. I tracked retention on two of my own client reels last month, and the version with a parallax intro held viewers eleven seconds longer on average.
Difference Between 2D and 3D Effects
A 2D effect moves on the X and Y axis only. Think of it like sliding a paper sticker across a desk. A 3D effect adds the Z-axis, which means objects can move closer or farther from the camera, rotate in space, and overlap with realistic depth. In Alight Motion, you create this illusion using perspective skew, layer stacking, and motion blur working together.
Why Creators Use 3D Effects in Alight Motion?
I get this question a lot from students I mentor: why bother with 3D when 2D is easier? The short answer is that 3D effects do the heavy lifting for engagement, and the long answer is below.
Better Viewer Engagement
Motion that mimics real-world depth feels familiar to the human eye. When something moves toward the camera or rotates in space, your audience instinctively pays more attention. I noticed this clearly when I switched from flat text overlays to 3D text on my own YouTube channel. Average view duration jumped by nearly eighteen percent within a month.
Professional-Looking Edits for Social Media
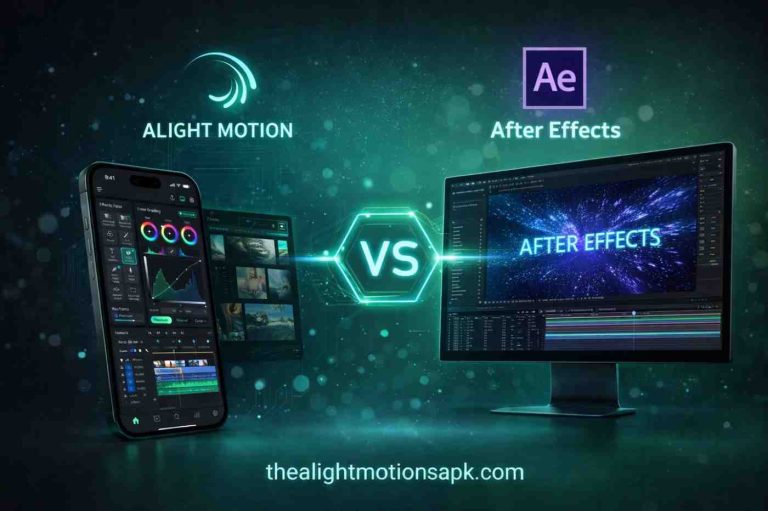
Brands and clients pay more for edits that feel cinematic. A 3D parallax intro, a rotating product showcase, or a depth-based transition instantly signals quality. Alight Motion gives mobile editors access to these techniques without forcing them to learn After Effects.
Smooth Motion and Cinematic Feel
The combination of keyframes, easing curves, and 3D rotation in Alight Motion creates buttery-smooth motion. Once you start using the velocity graph properly, your edits stop feeling like edits and start feeling like little films.
Popular Use Cases for Reels, Shorts, and AMVs
From what I see in the editing community, the biggest use cases right now are anime music videos, gaming montages, fashion reels, product reveal animations, and travel vlogs with parallax photo sequences. Each of these formats leans heavily on 3D Effects in Alight Motion to stand out in crowded feeds.
Tools You Need to Create 3D Effects in Alight Motion
Before diving into the steps, let me walk you through the actual tools inside the app that make all this possible. Knowing these by name will save you time once we start the tutorial.
Transform and Rotation Controls
Located inside any layer’s properties panel, the transform tools let you adjust position, scale, rotation, and skew. The rotation control offers separate sliders for X, Y, and Z axes, which is the foundation of everything 3D in this app.
Layer Management System
Alight Motion lets you stack unlimited layers, and this is where the magic of fake 3D depth begins. Each layer can be transformed independently, and the order you stack them determines what sits in front and what falls behind.
Keyframe Animation
Keyframes record changes over time. You set a starting value, jump to another point in the timeline, change the value, and Alight Motion animates the transition. For 3D work, you will mostly keyframe rotation, scale, and position.
Perspective and Skew Tools
Skew is the unsung hero of mobile 3D editing. Tilting a layer along one axis instantly gives it a sense of perspective, making flat shapes look like they are receding into the distance. Combined with rotation, skew can simulate complex camera angles.
Blur, Shadow, and Lighting Effects
Found in the Effects panel, these include Gaussian Blur, Drop Shadow, Glow, and Levels. Real 3D needs real shadows and lighting cues, and these effects let you fake them convincingly on a 2D canvas.
How to Create 3D Effects in Alight Motion? (Step-by-Step)
This is the main tutorial. I am going to walk you through exactly what I do when I open a fresh project for a client. Follow along on your phone if you can.
Step 1: Create a New Project
Open Alight Motion, tap the plus icon, and set your aspect ratio. For Reels and Shorts, use 9:16. For YouTube videos, go with 16:9. I always set frame rate to 60 fps because 3D motion looks visibly smoother at higher frame rates. Resolution should be 1080p minimum.
Step 2: Import Photos, Videos, or PNG Elements
Tap the add media button and bring in your assets. For depth-based 3D work, I recommend using PNG cutouts with transparent backgrounds. You can find free ones on sites like PNGTree or remove backgrounds yourself using any of the free AI tools available now.
Step 3: Add Multiple Layers for Depth
Stack your media in this order from bottom to top: background, mid-ground elements, main subject, foreground details. This stacking is what tricks the eye into reading depth. A landscape shot with a mountain in the back, a tree in the middle, and a person in front gives you three natural depth layers to work with.
Step 4: Use Rotation and Transform Controls
Select a layer, tap the properties icon, and find the rotation sliders. Try rotating the Y-axis by ten to fifteen degrees. You will see the layer tilt as if you are viewing it from an angle. Do not overdo it. Subtle rotations look more realistic than extreme ones.
Step 5: Create Perspective for a 3D Look
Apply the skew tool to your layers. A horizontal skew of around five degrees combined with a small Y-axis rotation creates the classic angled perspective you see in professional intros. This is the same technique used in opening titles for shows like Stranger Things.
Step 6: Add Keyframes for Motion Animation
Tap the keyframe icon on the rotation property at the start of your timeline. Move your playhead forward two seconds, then change the rotation value. Alight Motion automatically animates the change. Smooth out the motion by adjusting the easing curve to ease-in-out.
Step 7: Apply Blur, Shadow, and Lighting
Go to the Effects panel and add a Drop Shadow to your foreground subject. Set the opacity around forty percent and offset it slightly. Add a subtle Gaussian Blur to your background layer to simulate depth-of-field. This single trick is what separates amateur edits from polished ones.
Step 8: Export High-Quality 3D Video
Tap the export button, choose 1080p or 4K, set the bitrate to at least 20 Mbps, and pick MP4 as the format. For social media uploads, 60 fps with high bitrate keeps your 3D motion looking crisp even after platform compression.
How to Create 3D Text in Alight Motion?
3D text is probably the most requested effect I get asked about. It looks complicated, but the process is repeatable once you learn the pattern.
Adding and Customizing Text
Add a new text layer and type your phrase. Pick a bold, geometric font because thin fonts lose impact when extruded. Set your text color, alignment, and size before moving forward. Adjustments after duplication get messy.
Creating Depth Using Duplicate Layers
Duplicate your text layer twenty to thirty times. Yes, that many. Offset each duplicate by one pixel on the X and Y axes. Stack them behind the original. The result is a layered shadow that mimics extruded depth. You can change the color of these duplicates to a darker shade for added realism.
Applying 3D Rotation Effects
Select the entire group of text layers and apply a Y-axis rotation. The whole stack rotates together, and your flat text suddenly looks three-dimensional. Add a small keyframe animation to make it spin in dramatically.
Best Fonts for 3D Text Animations
From experience, the fonts that look best for 3D work are Bebas Neue, Anton, Bungee, and Impact. Avoid script fonts and ultra-thin weights. They lose their identity once duplicated and rotated.
Tips to Make 3D Titles Look Professional
Add a subtle glow behind the main text layer, keep the rotation animation between one and two seconds, and finish with a settling bounce using easing curves. These small touches separate a hobbyist title from a broadcast-quality one.
Creating Fake 3D Objects Using Layers
You do not need actual 3D models to create the illusion of three-dimensional objects. Smart layering does the same job, and Alight Motion handles it beautifully.
Layer Stacking Technique
Build your object from multiple flat shapes stacked in order of depth. For a 3D cube illusion, place a square at the back, slightly offset another square in front, and connect them visually with thin rectangles representing the sides. With careful skewing, the result looks like a real cube.
Using Shapes and PNG Elements
Alight Motion includes a shape library, and combining shapes with imported PNGs gives you endless creative options. I often use PNG renders of objects from free 3D asset sites and animate them as flat layers for a hybrid 3D look.
Creating Realistic Depth Effects
Apply different blur intensities to each layer based on its distance from the virtual camera. Background layers get more blur, foreground layers stay sharp. This depth-of-field simulation is one of the strongest 3D cues your eyes pick up.
Combining Motion Blur with Object Movement
Whenever an object moves quickly across the screen, add motion blur to its animation. Alight Motion has a built-in motion blur effect that follows the keyframed path. Without it, fast 3D motion looks robotic and fake.
How to Create the Parallax Effect in Alight Motion?
Parallax is my personal favorite. It is the effect that turns a still photo into a moving cinematic shot, and it is exactly the technique used in those viral travel reels you scroll past.
What Is the Parallax Effect?
Parallax is the illusion of depth created when foreground objects move faster than background objects relative to a camera. Look out a moving car window. The fence right next to you flies past while the distant mountains barely move. That is parallax.
Separating Background and Foreground Layers
Take a photo and cut out the main subject using a background remover. Now you have two layers: the original full image as the background, and the isolated subject as the foreground. Place them on the timeline with the subject layer on top.
Animating Camera Movement
Keyframe both layers to move in the same direction, but make the foreground layer move at a higher speed and larger distance than the background. The mismatch in motion speed creates that magical depth illusion. Three to five seconds of motion is enough for most reels.
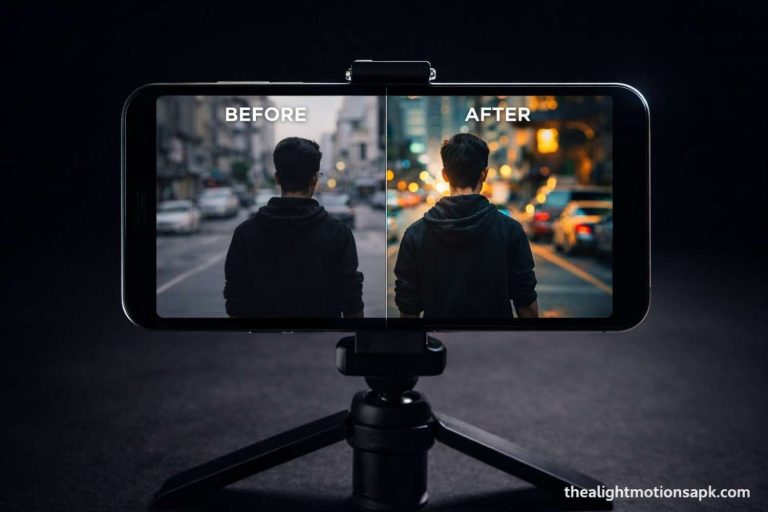
Making Videos Look More Cinematic
Add a slight camera shake using position keyframes with small random offsets. Layer a film grain effect on top, and finish with a subtle vignette. Suddenly your static photo looks like a frame from a feature film.
Lighting and Shadows in 3D Effects
Light direction is what sells the illusion of three dimensions. Without proper shadows and highlights, even the best 3D motion looks fake. Here is how I handle it.
Adding Realistic Shadows
Use the Drop Shadow effect on every layer that needs to feel grounded. Set the angle to match your imagined light source, typically forty-five degrees from the top-left. Reduce opacity to around fifty percent so the shadow feels natural, not painted on.
Using Glow and Blur Effects
Apply a soft glow to bright objects like neon text or light sources. The Outer Glow effect inside Alight Motion gives you control over intensity, color, and spread. Pair it with a small Gaussian Blur for that cinematic bloom you see in movie posters.
Adjusting Opacity and Blend Modes
Blend modes change how layers interact with each other. Screen and Add modes are perfect for light effects, while Multiply is ideal for shadows. Experiment with opacity sliders to find the sweet spot where the lighting feels integrated rather than stuck on.
Creating Realistic Lighting Angles
Pick one light direction and stick with it across all your layers. Consistency is what makes lighting feel believable. If your main subject is lit from the upper-left, every other element should follow the same rule.
Best Animation Techniques for 3D Effects
Motion is what brings 3D to life. Here are the techniques I use most often, in order of how frequently they show up in my own edits.
Smooth Zoom Animations
Slow zoom-ins and zoom-outs add subtle drama. Keyframe the scale property from 100 percent to 110 percent over four seconds, apply ease-out easing, and you have a Ken Burns style zoom that works in almost any context.
Camera Pan and Motion Simulation
Animate your entire layer group’s position to simulate a camera move. Slow horizontal pans work great for landscape shots, while vertical pans feel cinematic for portrait subjects.
Rotation Animations
3D rotation works best when it has weight. Add easing curves so your objects accelerate and decelerate naturally instead of moving at constant speed. Robotic motion is the number one giveaway of an amateur edit.
Multi-Layer Motion Effects
Animate multiple layers simultaneously with slightly different timings. The staggered motion creates richness and depth that single-layer animation cannot match.
Velocity and Easing Tips
Inside Alight Motion’s keyframe editor, you can adjust the velocity graph for each property. Pull the curve into an S-shape for natural motion. Linear motion almost always feels artificial, so I rarely leave keyframes on default.
Advanced 3D Editing Techniques in Alight Motion
Once the basics feel comfortable, these next techniques will push your edits into truly professional territory.
Multi-Layer 3D Scene Creation
Build entire scenes with five to ten depth layers. A street scene might have sky, distant buildings, mid-ground cars, sidewalk, foreground character, and a foreground prop. Animate each at different speeds for a fully immersive shot.
Cinematic Camera Movement
Group all your scene layers and animate the group as one unit while simultaneously animating individual layer parallax. The result is a layered camera move that feels like a real dolly shot.
Combining 2D and 3D Elements
Mixing flat 2D graphics like text or icons with 3D motion creates visual contrast. A flat logo floating in a 3D parallax scene draws the eye exactly where you want it.
Using Motion Blur for Realism
Apply motion blur selectively. Fast camera moves should have it, while slow drifts should not. Overuse of motion blur makes everything feel sluggish, so be deliberate.
Professional Transition Effects
Build custom transitions using scale, rotation, and opacity keyframes together. A zoom-and-rotate transition between two clips can replace boring cuts and instantly upgrade the pacing of your edit.
Common Mistakes to Avoid While Creating 3D Effects
I made every one of these mistakes in my first year of editing. Save yourself the trouble.
Overusing Rotation Effects
Rotating every element on every axis turns your edit into a dizzy mess. Pick one or two elements per scene to feature rotation animations. Restraint reads as polish.
Incorrect Layer Alignment
Layers that should align visually often drift apart when rotated or skewed. Use the snap-to-grid feature and double-check alignment before locking in keyframes.
Using Too Many Effects Together
Stacking blur, glow, shadow, and color correction on every layer kills performance and muddies the visual. Choose two or three effects per layer maximum.
Low-Quality Export Settings
Exporting at 720p or low bitrate ruins all your hard work. 3D motion needs detail to read correctly. Always export at 1080p minimum with bitrate above 15 Mbps.
Unbalanced Motion Speed
Layers moving at random speeds without a logical depth hierarchy break the 3D illusion. Background slowest, foreground fastest. Always.
Pro Tips to Make 3D Effects Look Better
These are the small habits that took my edits from decent to consistently impressive.
Keep Animations Smooth and Natural
Reference real-world physics. Things slow down before they stop, accelerate when they start, and rarely move in straight lines. Bake these instincts into your easing curves.
Use High-Resolution Assets
Low-resolution PNGs and photos pixelate the moment you scale them up for parallax. Source everything at 4K when possible. Free sites like Pexels and Unsplash have plenty of options.
Maintain Consistent Lighting
Once you pick a light direction, every shadow and highlight in your scene must follow it, especially when working with Camera Objects in Alight Motion. Inconsistency breaks immersion faster than any other mistake.
Use Subtle Depth Instead of Extreme Movement
Tiny movements often look more cinematic than huge ones. A two percent scale shift over three seconds can feel more professional than a dramatic zoom.
Test Different Camera Angles
Before settling on a composition, try three or four virtual camera angles by adjusting rotation and skew. The first version is almost never the best one.
Best Export Settings for 3D Videos in Alight Motion
Bad export settings can destroy a perfect edit. Here is what I use as my standard.
Recommended Resolution and FPS
For social media, 1080×1920 at 60 fps for Reels and Shorts. For YouTube, 1920×1080 at 60 fps. For higher-end clients, 4K at 60 fps if your phone supports it. 3D motion always benefits from higher frame rates.
Bitrate Settings for High Quality
Set bitrate to at least 20 Mbps for 1080p and 40 Mbps for 4K. Lower bitrates cause compression artifacts that destroy the fine motion blur and depth cues you worked hard to create.
Best Format for YouTube, TikTok, and Instagram
MP4 with H.264 codec is the universal safe choice. All major platforms accept it without re-encoding issues. Avoid MOV unless you have a specific reason to use it.
How to Reduce Lag During Export
Close all background apps before exporting. Lower your project’s playback preview quality during editing to keep things smooth, then export at full quality. If your phone overheats, give it a five-minute break before final export.
3D Effects Ideas You Can Try in Alight Motion
If you are stuck on what to make, here are project ideas that consistently perform well.
3D Text Intro Animation
A spinning logo or channel name intro is timeless. Keep it under three seconds and end on a clean settling pose.
Floating Photo Effect
Take a portrait, cut out the subject, and animate the cutout floating slightly above the background. Perfect for portfolio reels.
Cinematic Reel Editing
Use parallax photo sequences with slow zooms and ambient music. Travel and lifestyle creators eat this style up.
AMV and Gaming Edits
Fast 3D rotations synced to music beats are the bread and butter of the AMV community. Alight Motion handles these workflows better than most paid desktop software.
Social Media Promo Videos
Animated product reveals with rotating 3D-style packaging convert better than static product shots. Small businesses pay well for these.
Is Alight Motion Good for 3D Editing?
The honest answer is: yes, with caveats. Let me break it down.
Advantages of Using Alight Motion
It is mobile-first, affordable, and offers professional features like keyframes, vector support, and advanced effects. You can produce broadcast-quality 3D animations from a phone, which was unimaginable five years ago.
Limitations of Mobile 3D Editing
True 3D modeling and physics simulations are not possible. Everything you create is pseudo-3D. Complex scenes can also lag on older devices, so a phone with at least 6GB of RAM is recommended for smooth work.
Who Should Use Alight Motion for 3D Effects?
Mobile content creators, social media editors, freelancers handling small client projects, beginners exploring motion design, and anyone who wants cinematic results without a desktop setup. If you need full 3D modeling, look elsewhere. For everything else, this app delivers.
FAQ‘s
Can beginners create 3D effects in Alight Motion?
Yes, absolutely. The app is beginner-friendly, and the basic 3D techniques like rotation, parallax, and layered text take less than an hour to learn. Start with the step-by-step tutorial above and you will have your first 3D edit ready the same day.
How do you make 3D text in Alight Motion?
Add a text layer, duplicate it twenty to thirty times, offset each duplicate slightly to create depth, group them together, and apply a Y-axis rotation. Combine with a glow effect and easing curves for a polished result.
Which effect is best for realistic 3D animation?
The parallax effect combined with subtle motion blur and consistent lighting produces the most realistic results. For text and titles, layered duplication with skew transformation works best.
Why do 3D animations lag in Alight Motion?
Lag usually happens because of too many high-resolution layers, too many simultaneous effects, or a device with limited RAM. Reduce preview quality during editing, close background apps, and limit each scene to under ten layers when possible.
Can I create cinematic edits using Alight Motion?
Yes, cinematic edits are one of the strongest use cases for this app. Combining parallax, smooth keyframe animation, motion blur, color grading, and film grain effects produces results that rival desktop software.
What are the best settings for exporting 3D videos?
Export at 1080p or higher resolution, 60 fps, MP4 format with H.264 codec, and bitrate of at least 20 Mbps. These settings preserve the smoothness of 3D motion across all major social media platforms.
Is Alight Motion better than CapCut for 3D effects?
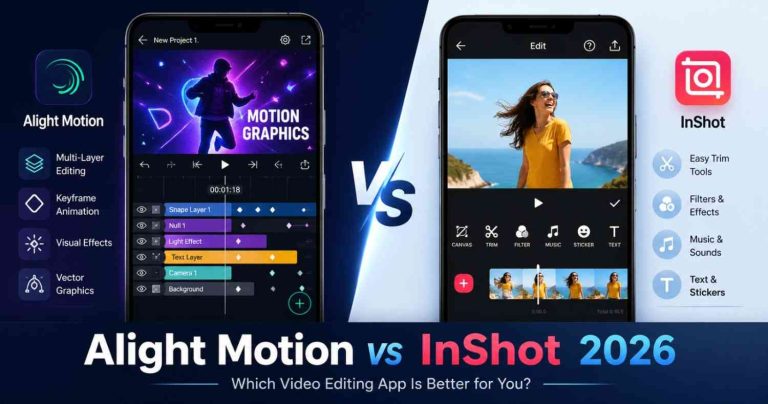
For 3D-style work, yes. Alight Motion offers far more control over keyframes, easing, and layer effects than CapCut, which is built more for quick edits than complex motion design.
Do I need the premium version for 3D effects?
The free version includes most tools needed for 3D effects. However, premium removes the watermark, unlocks higher export resolutions, and gives access to additional effects packs that speed up advanced workflows.
Final Thoughts
Three years ago, I would have laughed at the idea of producing cinematic 3D content from a phone. Today, I run a small editing business almost entirely from Alight Motion, and the 3D Effects in Alight Motion are the single biggest reason my edits stand apart. The techniques in this guide are exactly what I use on paid projects, and I have held nothing back.
Start small. Pick one technique from this guide, maybe the 3D text or the parallax effect, and master it before moving on. Within a few weeks of consistent practice, your edits will look unrecognizably better. And when you are ready to push further, come back to this guide for the advanced sections.
If this helped you, share it with a fellow editor who is still stuck on flat 2D edits. There is no reason for anyone with a phone to make boring videos in 2026.