
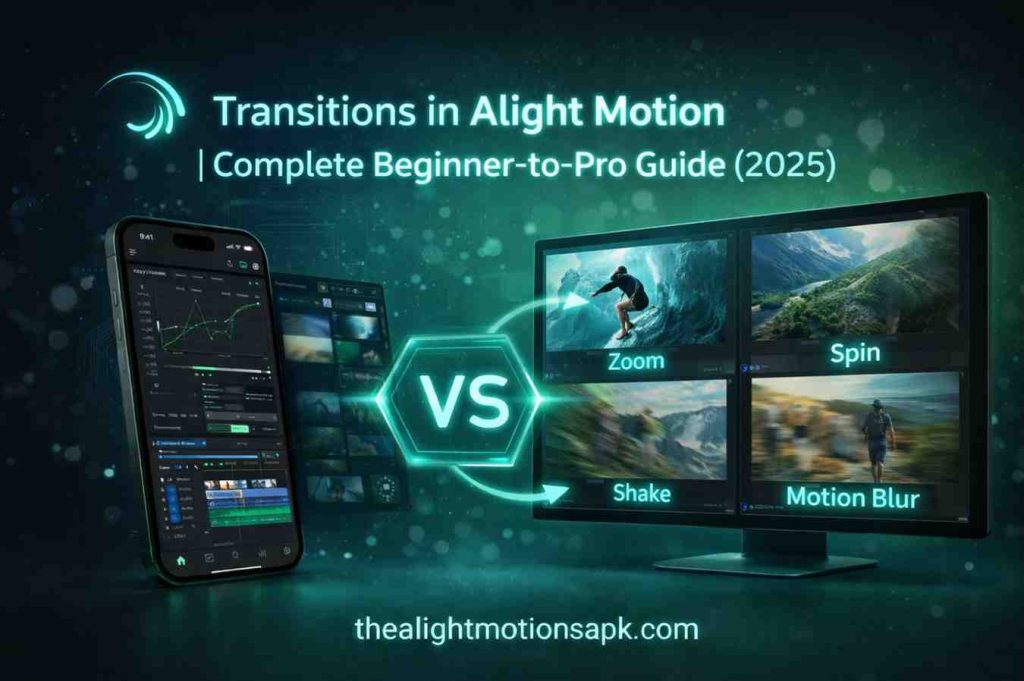
Transitions in Alight Motion – Complete Beginner-to-Pro Guide (2026)
I still remember the first time I tried to add a transition in Alight Motion. I had two video clips on my timeline, and I just wanted something anything to make the cut feel less abrupt. After some trial and error, some failed keyframe attempts, and honestly a bit of frustration, I finally got it right. That one smooth transition completely changed how my video looked. It went from feeling like a random clip dump to an actual edited video.
That moment is what got me hooked. Since then, I have spent a serious amount of time exploring every type of transitions in Alight Motion every style, every graph setting, and every creative trick the app has to offer. And everything I have learned from that journey is what this guide is built on.
Whether you are just getting started with transitions in Alight Motion or you have been editing for a while and want to take your skills to the next level this is the only guide you need.
What Are Transitions in Video Editing?
A transition is what happens between two video clips. When one scene ends and another begins, the way that change occurs is the transition. It could be an instant cut, a slow fade, a blur that sweeps across the screen, or a sharp shake that throws the viewer into the next scene.
In professional video editing, transitions do two important things. First, they maintain the flow of a video so the viewer does not feel jarred by sudden changes. Second, they communicate tone and energy. A gentle fade says calm and emotional. A hard shake says fast, raw, high energy. The transition you choose tells the viewer how to feel.
For creators making content for Instagram Reels, YouTube Shorts, or TikTok transitions are not just optional polish. They are part of the visual language of modern short-form content. Viewers expect them. A video without thoughtful transitions often feels unfinished, even if the footage itself is great.
What Are Transitions in Alight Motion?
Alight Motion handles transitions differently from most mobile editing apps. Unlike simple editors that give you a dropdown list of preset transitions to drag and drop, Alight Motion gives you actual control over how your transition works through keyframes, graph curves, visual effects, and layer blending.
This means the transitions you create in Alight Motion are not just cosmetic. They are built from animation logic the same animation logic used in professional desktop software. That is what makes Alight Motion stand apart from casual editing apps, and it is exactly why the transitions you build here look so much more polished and intentional than what you get from basic tools.
In simple terms: in Alight Motion, you are not just picking a transition. You are designing one.
Why Do Video Creators Use Transitions?
There is a reason professional editors obsess over transitions. A well-placed, well-timed transition can do things that footage alone cannot.
It keeps the audience engaged. When a video flows smoothly from one scene to the next, the viewer stays in the moment. A choppy, abrupt cut breaks that immersion. Transitions are the thread that stitches scenes together.
They also add personality to your content. Over time, your transition style becomes part of your signature as a creator. The way you move between clips, the timing you prefer, the effects you layer these small choices build up into a recognizable editing identity.
For creators in India, Pakistan, Bangladesh, and across South Asia making content for platforms like Instagram and YouTube, transitions in Alight Motion offer a real competitive advantage. The feeds are crowded. Content that has dynamic, well-executed transitions stops the scroll. It signals quality and effort, even if the viewer cannot specifically explain why.
Benefits of Smooth and Seamless Video Transitions
Smooth transitions are not just about looking good they have real, practical benefits for your content performance.
A seamless transition keeps watch time high. When viewers are visually engaged and the video flows well, they are far less likely to tap away. On platforms like YouTube and Instagram, watch time directly influences how broadly your content is distributed.
Smooth transitions also make your videos feel more cinematic. Even a simple clip shot on a mid-range Android phone can feel like it was produced with professional equipment if the editing especially the transitions is tight and intentional.
Finally, smooth transitions show your audience that you take your work seriously. In a competitive content landscape, that level of craft builds trust and loyalty over time, especially when mastering techniques like Transition in Alight Motion.
Understanding Alight Motion Animations and Keyframes
Before you can create great transitions, you need to understand what powers them: keyframes. This is not as complicated as it sounds once you grasp the idea, everything else in Alight Motion starts to click.
What Are Keyframes in Alight Motion?
A keyframe is a marker you place at a specific point in time that tells Alight Motion the exact state of a layer at that moment. Position, scale, rotation, opacity, blur anything that can change over time can be controlled with keyframes.
When you place two keyframes on a layer one at the beginning of a change and one at the end Alight Motion automatically fills in everything in between. This is called interpolation, and it is the engine behind every smooth animation you see in the app.
Think of it this way: at frame 1, your clip is fully visible. At frame 10, it is completely faded out. You set keyframes at both points, and Alight Motion handles the fade automatically. That is keyframe animation in its simplest form.
Why Keyframe Animation Is Important for Transitions
Keyframes give you control that preset transition tools simply cannot match. When you build your transition with keyframes, you decide exactly how fast it moves, how it curves, when it accelerates, and when it slows down. This level of control is what separates a transition that looks handmade and intentional from one that looks like it came from a template.
For the most polished transitions the kind that get saved and shared keyframe animation is always the foundation.
Types of Transitions in Alight Motion
Alight Motion APK supports a wide range of transition styles. Here are the main categories you will work with most often, and what each one is best used for.
Smooth Transitions
Smooth transitions are the bread and butter of Alight Motion editing. These are motion-based transitions where a layer glides from one state to another position, scale, or rotation using eased keyframes. The movement feels natural and fluid, not mechanical.
Smooth transitions work for almost every type of video. They are the default go-to when you want something polished but not dramatic.
Fade Transitions
A fade transition gradually changes the opacity of a clip either fading to black, fading to white, or cross-fading between two clips. In Alight Motion, you control this by keyframing the opacity of your layers.
Fades are perfect for emotional moments, time-lapse sequences, or whenever you want to signal a shift in mood or time period. They are gentle, cinematic, and timeless.
Blur and Motion Transitions
These transitions use Alight Motion’s blur effects directional blur, radial blur, or gaussian blur combined with motion keyframes to create a sweeping, high-energy transition. The clip appears to rush off screen in a blur, and the next clip rushes in from the opposite direction.
This style is extremely popular on Instagram Reels and YouTube Shorts. It feels fast, dynamic, and modern. If you want transitions that grab attention, blur-and-motion is one of the most effective styles you can use.
Shake Transitions
Shake transitions use rapid, back-and-forth position keyframes to create a physical jolt between clips. The screen appears to shake sometimes subtly, sometimes aggressively before cutting to the next scene.
These transitions work extremely well for energetic music videos, action-style content, and highlight reels. When the timing is synchronized with a beat drop, shake transitions become incredibly impactful.
Zoom Transitions
Zoom transitions scale a clip rapidly inward or outward, creating the feeling of pushing into or pulling out of a scene. In Alight Motion, these are created by keyframing the scale property of a layer starting at 100% and pushing to 130% or higher across a few frames.
When done right, zoom transitions feel intentional and dramatic. They work particularly well for travel content, cinematic montages, and sports highlight videos.
Custom Transitions
Custom transitions are exactly what they sound like transitions you design yourself, from scratch, using any combination of Alight Motion’s tools. You might combine a zoom with a blur and a shake. You might create a wipe effect using masks. You might build a spin transition that feels completely original.
These transitions take more time and skill to create, but they are also what set your work apart from everyone using the same preset packs.
How to Do Transitions in Alight Motion? (Step-by-Step)
This is the part most people come here for. Here is the complete process, exactly as I do it myself.
Step 1: Create a New Project
Open Alight Motion and tap the plus icon to create a new project. Choose your aspect ratio based on where the video will be published 9:16 for Instagram Reels, TikTok, and YouTube Shorts; 16:9 for standard YouTube videos; 1:1 for square Instagram posts.
Set your frame rate to 30fps for standard content or 60fps if you want smoother, more fluid transitions. A higher frame rate gives your animations more frames to work with, which results in noticeably smoother motion.
Step 2: Import Your Video Clips or Images
Tap the media import button and bring in the clips you want to connect with a transition. Import at least two clips one that will end and one that will begin.
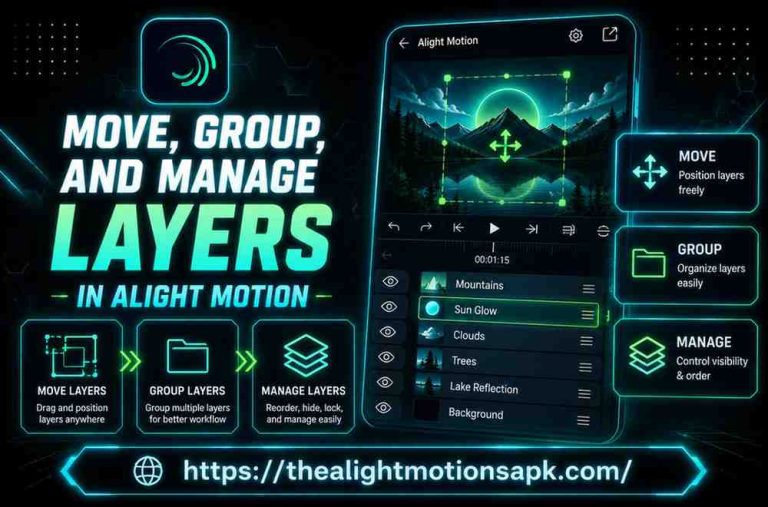
Once imported, your clips will appear in the layers panel. Before you arrange anything on the timeline, it helps to rename your layers so you know which is which. This becomes especially useful when you are working with multiple clips and layers simultaneously.
Step 3: Arrange Clips on the Timeline
Drag your clips onto the timeline in the order you want them to appear. Arrange them sequentially clip one first, clip two immediately after.
This is where you decide where the transition will happen. Typically, transitions begin at the end of the first clip and complete at the beginning of the second clip. The overlap or gap between clips on your timeline determines the timing of your transition.
Pay attention to the audio as well, if your clips have sound. Transitions feel much stronger when they are timed to a beat or a natural break in the audio, especially when working on Transition in Alight Motion.
Step 4: Add Keyframes to Create Motion
Select the layer you want to animate at the transition point. Move your playhead to where you want the transition to begin. Enable keyframe recording by tapping the diamond icon next to the property you want to animate position, scale, rotation, or opacity.
Now move your playhead forward by a few frames (anywhere from 5 to 15 frames depending on how fast you want the transition). Change the property value move the layer off screen, scale it down, reduce its opacity. Alight Motion will automatically create a second keyframe at this position.
You now have the basic structure of a keyframe transition. Play it back and you will see the layer animate between the two states you defined.
Step 5: Apply Transition Effects
To add visual polish to your keyframe transition, apply effects from Alight Motion’s effects library. Tap on the layer, go to the effects panel, and explore options like Motion Blur, Gaussian Blur, Chromatic Aberration, Glow, or Distortion.
For a blur-and-motion transition, apply directional blur during the middle frames of the transition the frames where the clip is mid-movement. This creates the illusion of speed and makes the transition feel cinematic.
For a shake transition, add a Shake or Vibration effect and keyframe its intensity start at zero, peak in the middle of the transition, and return to zero.
Step 6: Use Graph Editor for Smooth Animation
This is the step that most beginners skip and it makes a massive difference. Open the Graph Editor for your keyframes by tapping on the graph icon in the timeline panel.
The graph shows you the speed curve of your animation. A straight line means constant speed. An S-shaped curve means the animation starts slowly, accelerates, and then eases back down this is called an ease-in/ease-out curve, and it is what makes transitions feel organic rather than mechanical.
Pull the Bezier handles on your keyframe graph to shape the curve. For most transitions, you want the motion to start with some acceleration and ease gently at the end. Experiment with the curve until the movement feels natural when you preview it.
This single adjustment getting the graph curve right is what separates amateur-looking transitions from professional ones.
Step 7: Preview and Fine-Tune the Transition
Before you do anything else, preview the transition multiple times. Watch it at full speed. Watch it slowed down. Check for these things: Does the timing feel right? Does the motion feel natural or mechanical? Is the transition too fast, too slow, too subtle, or too aggressive?
The graph settings and keyframe positions are all adjustable. Do not lock yourself into the first version. Some of my best transitions went through four or five rounds of adjustments before they felt exactly right.
If you have audio, sync your preview with the sound. A transition that lands exactly on a beat hit feels infinitely better than one that is even half a second off.
Step 8: Export Your Final Video
Once you are happy with the transition, it is time to export. Tap the export button and choose your settings carefully.
For Instagram Reels, YouTube Shorts, and TikTok: export at 1080p, 30fps or 60fps, MP4 format. For standard YouTube videos: 1080p or 4K, 30fps, MP4. Keep the bitrate high enough to preserve quality, especially if your transition involves blur effects, which can look compressed at low bitrates.
Render the video and review the exported file before posting. Sometimes effects look slightly different in the export compared to the preview a quick check saves you from posting something that does not look the way you intended.
Different Ways to Create Transitions in Alight Motion
There are three distinct approaches to creating transitions in Alight Motion, and each serves a different editing situation.
Method 1: Manual Keyframe Transitions
This is the foundational method building your transition entirely from scratch using keyframes. You have complete control over every aspect of the motion, timing, and effects. This method takes the most time but produces the most unique, personalized results.
Use this method when you are creating a signature transition style, when you need a transition that fits a very specific timing or concept, or when you want to learn how transitions actually work rather than just applying a preset.
Method 2: Using Built-In Effects
Alight Motion has a library of built-in visual effects that can serve as transitions when applied and keyframed correctly. Instead of animating the layer itself, you animate the intensity of an effect fading a blur in and out, ramping up a distortion, or animating a color shift between clips.
This method is faster than pure keyframe animation and produces distinctive visual results. It works especially well for artistic, stylized content where you want the transition to feel more like a visual effect than a movement.
Method 3: Using Preset Transition Packs
The Alight Motion community particularly across India, Pakistan, Indonesia, and the broader South Asian creator ecosystem has produced thousands of free transition preset packs in QR code and XML format. These are pre-built transitions that you import into your project and apply directly.
Preset packs are the fastest way to get professional-looking transitions without building them yourself. They are especially useful when you are under time pressure or when you want to achieve a specific trending style that is already popular on social platforms.
The trade-off is that presets are widely used, which means your transitions will not be unique to you. For creators who care about having a distinct editing style, presets are a starting point, not the finish line.
How to Customize Transition Effects in Alight Motion?
Using a built-in effect or a preset is just the beginning. Customizing it is where the real creativity happens.
Adjust Speed and Duration
The most basic customization is timing. Move your keyframes closer together to speed up a transition or further apart to slow it down. Even a minor timing adjustment can completely change how a transition feels a 10-frame blur transition that felt rushed might feel perfect at 15 frames.
Experiment with different durations. Fast transitions (5-8 frames) feel punchy and energetic. Medium transitions (10-20 frames) feel dynamic but controlled. Slow transitions (25+ frames) feel cinematic and deliberate. Match your transition speed to the pacing and energy of your video.
Modify Motion Curves with Graphs
Once you have the basic timing, use the Graph Editor to reshape the motion curve. As mentioned earlier, this is the detail that most people overlook and that makes the biggest difference.
For most transitions, you want an ease-out curve—the animation starts at full speed and gradually decelerates. For zoom transitions, an ease-in/ease-out (S-curve) feels most natural.
For shake transitions, sharp linear keyframes with no easing often feel more raw and impactful, especially when comparing newer tools with Alight Motion Old Version where easing options were more limited and less refined.
Try different curve shapes and preview each one. The right curve is subjective it is the one that feels correct for the specific moment in your video.
Create Unique Transition Styles
To build something truly original, start layering. Combine a position animation with a scale animation and a blur effect simultaneously. Add a color grade shift between the two clips. Include a subtle audio effect that syncs with the transition moment.
The more intentionally you combine these elements, the more distinctive your transitions become. Some of the most popular transition presets in the Alight Motion community started as someone experimenting with exactly this kind of layering.
How to Make Smooth Transitions in Alight Motion?
Smooth transitions are the most in-demand style, and getting them right consistently comes down to a few key practices.
Best Graph Settings for Smooth Movement
For genuinely smooth, natural-feeling transitions, the graph curve is everything. The setting that works most reliably is an ease-out curve meaning the animation begins with energy and gently slows as it reaches its endpoint.
In the Graph Editor, pull the right-side Bezier handle downward to create this deceleration. For an even more polished feel, also apply a slight ease-in at the start this means the animation does not begin at full speed instantly, which can feel abrupt.
The combination of ease-in at the start and ease-out at the end is called a smooth or S-curve. This is what professional motion designers use constantly, and it works just as well in Alight Motion as it does in After Effects.
Tips to Achieve Seamless Transitions
Use matching motion between clips. If your first clip ends with a camera pan to the right, start your second clip with a pan continuing from the right. This continuity of motion makes the transition feel invisible rather than jarring.
Match the color and brightness of your clips at the transition point. A sharp jump from a warm-toned scene to a cold-toned scene distracts the viewer. Adjust your color grades so the transition point is visually consistent.
Keep transitions short in fast-paced content. For Reels and Shorts where the pace is high, transitions that are 8-12 frames long feel tight and professional. Long transitions can feel slow and interrupt the rhythm of the video.
Using Preset Transitions for Faster Editing
When to Use Presets?
Presets are ideal when you are working against a deadline, when you are creating high-volume content, or when you want to quickly test what a specific transition style looks like before building your own version.
They are also genuinely useful when you are new to Alight Motion. Importing a preset and studying how it is built what keyframes are set where, what effects are applied is one of the best ways to learn how transitions are constructed.
Pros and Cons of Preset Transitions
The main advantage of presets is speed. You can apply a polished, complex transition in seconds. For creators producing multiple Reels per week, this time saving is significant.
The downside is originality. Because preset packs are shared publicly and used by thousands of creators, your transitions will look similar to many other videos in the same niche. For creators who are building a recognizable editing identity, over-reliance on presets can limit how distinctive your content feels.
The best approach is to use presets as inspiration and learning tools, then customize them or build your own versions once you understand how they work.
Popular Transition Styles in Alight Motion
Over time, certain transition styles have become iconic in the Alight Motion creator community. Here are the ones that appear most frequently in popular content.
Swipe Transition
A sharp, directional wipe where the first clip slides off screen and the second slides in from the opposite direction. One of the cleanest and most versatile transitions you can create. Works in almost every context.
Zoom In and Zoom Out Transition
The camera appears to rush into a scene or pull back dramatically between cuts. Created by rapidly scaling the layer to a very high or very low value at the transition point. Feels immersive and cinematic, especially in travel and lifestyle content.
Blur Transition
The scene blurs out and the next scene emerges from blur. This style has a dreamy, dynamic quality that works especially well in music-driven content. The key is applying the blur effect at peak intensity for only a few frames just enough to create the effect without making it feel dragged out.
Shake Effect Transition
High-frequency position vibration between clips. Best when timed to a bass drop or a sharp sound effect. When perfectly synced to music, shake transitions have an almost physical impact that keeps the viewer locked in.
Spin Transition
A rapid 90 or 180-degree rotation on the Z-axis between clips, creating the illusion of the camera spinning. Popular in creative, artistic content and dance videos. Works best when the rotation speed is very fast usually concentrated in 6–10 frames.
Velocity Transition
A technique borrowed from professional video editing where the speed of the clip itself ramps up dramatically at the cut point, creating a hyper-speed effect. This requires keyframing the time remapping or speed properties of the clip, and the results feel incredibly dynamic.
Best Transition Ideas for Reels, Shorts, and TikTok Videos
Instagram Reels Transition Ideas
For Reels, you want transitions that are visually striking but complete quickly ideally within 10–15 frames. The most effective Reel transitions involve a physical action to disguise the cut: a hand wipe across the camera, a jump where the clip cuts at the peak of the jump, or a spin where the rotation masks the edit.
Pair these physical transitions with matching scale or rotation keyframes in Alight Motion to amplify the effect. When the physical camera movement and the digital transition align perfectly, the result looks seamless and impressive.
YouTube Shorts Transition Ideas
YouTube Shorts audiences tend to respond well to transitions that are slightly more cinematic than typical TikTok content. Smooth zoom transitions, elegant fades, and controlled blur effects tend to perform well.
Since Shorts can be a bit longer than a typical TikTok, you also have slightly more room to let transitions breathe 15–20 frames instead of 8–10. Use that room to make transitions feel intentional rather than rushed.
TikTok Transition Effects
TikTok is where the most experimental and trendy transitions live. Shake transitions, glitch effects, chromatic aberration transitions, and rhythm-based cuts are all heavily used and appreciated by TikTok audiences.
On TikTok, syncing your transitions to music is especially important. The platform’s audience is highly attuned to beat synchronization, and a transition that lands even slightly off the beat is noticeable. Use Alight Motion’s timeline carefully to align your transition keyframes precisely with the audio waveform.
Advanced Transition Techniques in Alight Motion
Creating Custom Transitions with Keyframes
Advanced custom transitions combine multiple animated properties simultaneously. For example, a cinematic scene change might animate position, scale, rotation, and opacity all at once each with its own carefully tuned graph curve across 15–20 frames.
The key to keeping complex multi-property animations from feeling chaotic is timing offset. Instead of starting all the animations at exactly the same frame, stagger them slightly. Start the position animation one or two frames before the scale animation. This creates a layered, organic feel rather than a mechanical, simultaneous effect.
Combining Blur and Motion Effects
One of the most effective advanced techniques is applying a directional blur that matches the direction of a motion transition. If the clip is moving to the right, apply a horizontal motion blur. The blur reinforces the sense of speed and direction, making the transition feel physically convincing.
In Alight Motion, apply the blur effect to the layer, then keyframe the blur intensity zero at the start, peak in the middle 3–5 frames, and back to zero at the end. This creates a natural arc that mirrors how real camera motion blur behaves.
Using Multiple Layers for Cinematic Effects
For truly cinematic transitions, add a dedicated effect layer above your clip layers. This could be a light leak overlay, a lens flare, a film burn, or even a simple white flash. Animate the opacity of this effect layer to peak at the exact frame of the transition cut.
This technique is what gives many professional Alight Motion edits that “produced” quality the transition is not just happening in the clips, it is happening in the entire visual frame. Even a simple white flash layer, fading from 0% to 100% opacity and back across 4 frames at the cut point, dramatically elevates the production value of a transition.
Adding Motion Blur for Professional Results
Motion blur is what separates digital animations from physical camera movement. When you animate a layer in Alight Motion without any blur, the movement looks computer-generated. When you add directional blur proportional to the speed of movement, it starts to look like real, captured motion.
Apply the Motion Blur effect from Alight Motion’s effects library and keyframe the blur amount to match the speed of your animation. High-speed keyframes get strong blur. Slow-down keyframes get minimal blur. This dynamic blur application is what professional motion designers do in desktop software and you can replicate it fully in Alight Motion.
Common Transition Mistakes to Avoid
Learning what not to do is just as valuable as learning what to do. These are the mistakes I see most often, and ones I made myself early on.
Overusing Effects
One transition effect can elevate a video. Ten different transition effects in a one-minute video will exhaust the viewer and make the editing feel disorganized. Pick one or two transition styles that work for your content and use them consistently. Restraint is a professional skill.
Poor Timing Between Clips
A transition that starts too early or ends too late disrupts the rhythm of a video. Spend time refining your transition timing until it feels invisible the viewer should be watching the content, not the transition.
Incorrect Graph Settings
Leaving keyframes on their default linear interpolation a straight line in the graph produces mechanical, robotic-feeling transitions. Always check the graph after placing keyframes and adjust the curves to create natural easing. This single habit will improve every transition you make.
Unbalanced Motion Speed
Starting a transition at full speed and stopping abruptly or starting slowly and never accelerating creates an unnatural feel. Motion in the real world always has some acceleration and deceleration. Your animations should too. Use ease-in and ease-out curves consistently.
Tips to Improve Your Transitions in Alight Motion
Make Transitions Look More Natural
Use reference footage. Watch professional video content you admire and pay attention to how and when transitions occur. Note the pacing, the style, the duration. These observations will inform your own transition choices far more effectively than any tutorial.
Work in a high frame rate project when you need precise control over transition timing. At 60fps, each frame is just 16 milliseconds. This granularity lets you tune transitions to an almost imperceptible level of detail.
Create Faster and Cleaner Edits
Organize your timeline before you start adding transitions. Rename layers, group related elements, and keep your workspace clean. A cluttered timeline leads to mistakes and makes it much harder to fine-tune transitions after they are placed.
Use markers to note where beats or key moments occur in your audio. Build your transitions around these audio markers rather than placing them randomly. Rhythm-driven transitions are almost always more compelling than timing-independent ones.
Tricks Used by Professional Editors
Professional editors use what is called a J-cut and an L-cut audio from the next scene starts slightly before the visual transition, or continues slightly after it. This technique creates a sense of continuity and makes cuts feel intentional rather than abrupt. You can experiment with this approach in Alight Motion by slightly overlapping your audio layers at transition points.
Duplicate your transition across clips by copying the keyframe data and pasting it onto subsequent layers. This keeps your transitions consistent throughout the video without rebuilding them from scratch each time.
Ways to Make Transitions More Seamless
Match the visual weight at the cut point. If the first clip has a bright white area at the top right of the frame, begin the second clip with a bright area in a similar position. The eye follows visual patterns, and matching these elements at the cut makes transitions far less perceptible.
Use sound design. A brief whoosh, impact, or transition sound effect placed at the exact frame of the cut amplifies the visual effect and makes the transition feel physical. Alight Motion allows you to add audio layers, so you can import transition sound effects and sync them to your visual transitions precisely.
Transition Optimization and Export Settings
Previewing Before Export
Always preview your full video not just individual transition moments before exporting. Context matters. A transition that looks great when viewed in isolation might feel off when placed within the full rhythm of the video.
If possible, preview on the device or screen where your audience will watch it. A transition that looks sharp on your editing phone at full brightness might look different on a dim screen or a large monitor. Checking across contexts helps you catch issues before publishing.
Recommended Export Settings
For social media content, export at 1080p resolution, MP4 format, H.264 codec. This combination gives you strong visual quality at a file size that uploads efficiently to Instagram, TikTok, and YouTube.
If your video is intended for YouTube as a primary platform and especially if it has complex visual transitions with lots of motion export at the highest quality your phone can handle. Quality loss during compression is most visible in areas of fast motion, which is exactly where your transitions live.
Best Resolution and Frame Rate
For Instagram Reels and TikTok: 1080 x 1920 (9:16), 30fps or 60fps. For YouTube Shorts: same dimensions, 60fps preferred for smoother playback. For standard YouTube: 1920 x 1080 (16:9), 30fps or 60fps depending on your content style.
60fps projects produce smoother transitions because there are more frames for the animation to complete across. If transition smoothness is a priority for your content, work and export in 60fps whenever possible.
FAQ‘s
How do you do transitions in Alight Motion?
You create transitions in Alight Motion by placing keyframes on a layer at the point where you want the transition to occur, animating properties like position, scale, opacity, or rotation, and optionally applying visual effects like blur or distortion. The Graph Editor lets you control the speed curve of the animation to create smooth, natural movement. The full step-by-step process is covered in detail in this guide above.
How can I make smooth transitions in Alight Motion?
Smooth transitions come from using the Graph Editor to add ease-in and ease-out curves to your keyframes. Instead of a straight-line graph (which produces mechanical motion), shape your keyframe curve into an S-curve or ease-out arc. This gives your animations natural acceleration and deceleration, which is what makes movement feel organic and smooth.
Which transition effects are most popular?
The most popular transition styles in the current Alight Motion community are smooth motion transitions, blur-and-swipe transitions, zoom transitions, and shake transitions. For trending short-form content on Instagram and TikTok, blur transitions and shake transitions timed to music beats are particularly common.
Can I create custom transitions in Alight Motion?
Yes, and this is one of Alight Motion’s strongest features. You can build entirely original transitions by combining keyframe animation on multiple properties simultaneously, applying and animating visual effects, using masks, and layering multiple elements. Custom transitions give your content a unique visual identity that presets cannot replicate.
Are preset transitions better than manual transitions?
Neither is universally better they serve different purposes. Preset transitions are faster to apply and useful for consistent high-volume content production. Manual transitions take more time but produce original results and teach you more about how animation works. The best approach is to understand both and choose based on your specific needs.
What graph settings are best for smooth transitions?
An ease-out curve where the animation starts with full energy and gradually decelerates works well for most transitions. For a more polished feel, use an ease-in/ease-out S-curve, which adds a soft acceleration at the start. In the Graph Editor, pull the Bezier handles to shape the curve: pull the right handle downward for ease-out, and pull both handles to create an S-curve.
Why do my transitions look laggy?
Laggy transitions usually come from one of three causes: too many heavy effects on a single layer overloading your device during preview, working on a project with too many simultaneous layers, or keyframes placed too close together creating animation the app struggles to render in real time. Try simplifying the effects on your transition layers, reducing project complexity, or previewing after rendering a cached version.
Which transitions are best for Instagram Reels and TikTok?
For Instagram Reels, smooth zoom transitions and swipe transitions with sound effects tend to perform well. For TikTok, shake transitions and blur transitions timed to music beats are consistently popular. In both cases, keeping transitions short 8 to 15 frames and synchronized to audio beats is what makes them feel professional rather than amateur.
Conclusion
If there is one thing I have learned after spending serious time with Alight Motion’s transition tools, it is that the gap between a mediocre transition and a great one usually comes down to a few small details: the graph curve, the timing, and whether the transition serves the video or distracts from it.
The creators whose work consistently looks polished are not the ones with the most dramatic effects. They are the ones who have built an intuition for timing for knowing exactly when a transition should hit, how fast it should move, and when a simple clean cut is actually the better choice.
Start with the basics. Get your keyframes right. Learn the Graph Editor. Then layer in the effects and customization. This guide has given you the full foundation everything else comes from practice and experimentation.
The best transitions you will ever create are the ones you have not made yet. Go build them.