
Basic Tools and Functions in Alight Motion | Complete Beginner-to-Pro Guide (2026)
If you’ve spent time scrolling through TikTok or Instagram Reels wondering how creators pull off those buttery transitions, glowing text reveals, and cinematic color grades, there’s a good chance the answer is Basic Tools and Functions in Alight Motion.
Over the past few years it has quietly become one of the most powerful video editing apps available on mobile, with a particularly strong following among creators across India, Pakistan, and the rest of South Asia especially for those looking into Alight Motion as a go-to editing tool.
Here’s the catch though: most beginners open the app for the first time and immediately feel lost. The interface looks dense, there are dozens of tools crammed into small menus, and it’s not always clear where to even begin. That confusion is exactly why this guide exists.
What Is Alight Motion, and Why Has It Become So Popular?
Alight Motion is a professional-level video editing and motion design app built for both Android and iOS. Unlike lightweight editors that mostly let you trim footage and slap on a filter, Alight Motion hands you keyframe-based animation, vector graphics tools, a full multi-layer timeline, and a deep library of visual effects all running on your phone.
What really sets it apart is the sheer level of control. Practically any property on any layer can be animated, blending modes can be layered on top of each other, green screen footage can be keyed out with chroma key, and vector shapes can be drawn and edited from scratch. It’s the kind of toolset that wouldn’t feel out of place on a desktop editing suite.
Who Actually Uses Alight Motion?
The app’s user base is surprisingly broad. YouTubers use it to build channel intros and motion graphics packages. TikTok and Reels editors lean on it for slick transitions and kinetic text. Graphic designers use it to animate logos and social posts.
Even editors doing paid client work often reach for Alight Motion Pro when they need something powerful but don’t have access to a desktop machine. In South Asia specifically, the app has become something of a launchpad an entire generation of young creators has built editing careers using nothing but Alight Motion on their phones.
Free vs. Premium: What You Actually Get
The free version of Alight Motion is genuinely capable, but exports carry a watermark and a handful of premium effects and fonts stay locked. Subscribing removes the watermark, unlocks the full effects library, gives you premium font access, and raises your export resolution ceiling.
Serious creators will likely want to upgrade eventually, but there’s no need to pay anything just to learn the free tier covers every core tool discussed in this guide.
How It Compares to Other Mobile Editors
Apps like CapCut, InShot, and VN are designed around speed and simplicity. Alight Motion is designed around depth and control. It’s really the only mainstream mobile editor offering true keyframe animation, vector drawing tools, layered blending modes, and a proper multi-track timeline. If your goal is output that looks like it came out of After Effects but made entirely on a phone this is the app built for that.
Getting Set Up: System Requirements and Installation
Before jumping into the tools themselves, it’s worth making sure your phone can actually handle the app comfortably. Alight Motion is demanding on hardware, and an older or weaker device can mean lag, crashes, or slow renders while you’re mid-edit.
Device Compatibility
The app runs on Android 5.0 and above, and on iOS 13 and above. That said, for genuinely smooth performance especially once you’re stacking several layers, effects, and higher-resolution clips a phone with at least 4GB of RAM is strongly recommended. Most mid-range and flagship phones released in the last three or four years will run it without much trouble.
Installing and Setting Up the App
Alight Motion is available through the Google Play Store and the Apple App Store. Once installed, you’ll be asked to sign in or create a free account this is what lets you save projects to the cloud and access shared community presets and templates. After that, you land on the home screen, where starting a new project is just a tap away.
A Few Settings That Help Performance
If your phone heats up or playback starts stuttering, dropping the preview quality in the app’s settings can help a lot and importantly, it won’t affect your final export quality, only how smooth things feel while you’re editing. It’s also worth keeping at least 2GB of free storage on your device, since Alight Motion needs breathing room to process effects and render previews efficiently.
Quick Reference: Project Settings by Platform
When starting a new project, your first decision is resolution and aspect ratio. As a quick cheat sheet:
- TikTok / Instagram Reels: 1080 × 1920 (9:16 vertical), 30fps
- YouTube standard: 1920 × 1080 (16:9 horizontal), 30 or 60fps
- Instagram square posts: 1080 × 1080 (1:1), 30fps
- YouTube Shorts: 1080 × 1920 (9:16 vertical), 30fps
Getting Familiar With the Interface
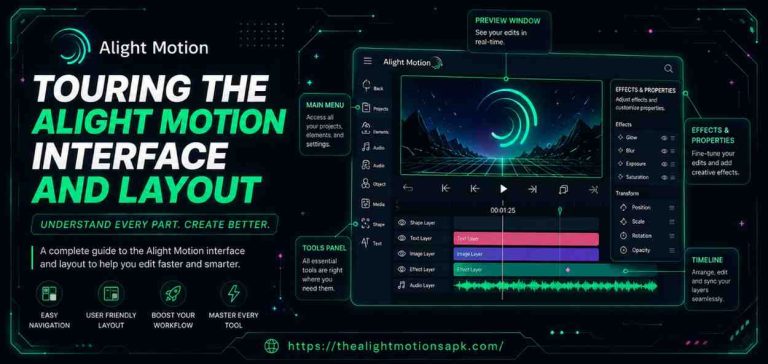
The first time you open a project, the screen can feel cluttered. Once you understand what each section is actually doing, though, it clicks pretty quickly. There are three main areas worth knowing well.
The Preview Window
Sitting at the top of the screen, the preview window shows exactly what your video looks like at whatever point the playhead is sitting on. You can pinch to zoom in or out, tap directly on elements in the preview to select their layer, and use two fingers to pan around the canvas. This is where you’ll visually reposition things, resize elements, and check your animations in real time.
The Timeline
Running along the bottom, the timeline is where every layer lives and where all your timing decisions happen. Each layer shows up as its own colored bar, and dragging the playhead left or right scrubs through your project. Trimming clips, repositioning elements in time, and setting animation durations all happen here it’s effectively the spine of your entire edit.
Toolbars and Menus
Around the timeline and preview, you’ll find the various menus that control everything else. The plus button adds new layers. Tapping any layer opens its properties panel, where position, scale, opacity, effects, and keyframes all live.
A toolbar near the bottom gives quick access to frequently used actions like split, trim, and transform. It takes a bit of muscle memory to know where everything is, but the layout is more logical than it first appears.
Starting Your First Project
A few decisions made at the very start of a project shape your entire workflow, so it’s worth getting them right early.
Picking Resolution and Aspect Ratio
Resolution controls sharpness. For most social content in 2026, 1080p remains the standard choice. 4K is available if your device can keep up and you’re targeting a big screen or a quality-focused YouTube channel, but it will noticeably slow down editing on most phones. Aspect ratio should simply match wherever you’re planning to publish.
Frame Rate Basics
Frame rate determines how smooth motion looks. 30fps is the standard for most everyday content. 60fps gives a noticeably smoother, more cinematic feel, especially for action or gaming footage. For slow motion, the trick is shooting or editing at 60fps and then playing it back at 30 that’s what produces clean, non-choppy slow-motion results.
Background and Transparency
If you’re building a motion graphic or animated element meant to sit on top of other footage later, set the background to transparent so the export carries an alpha channel. For a regular video project, a plain black or white background is fine since your footage will cover it anyway.
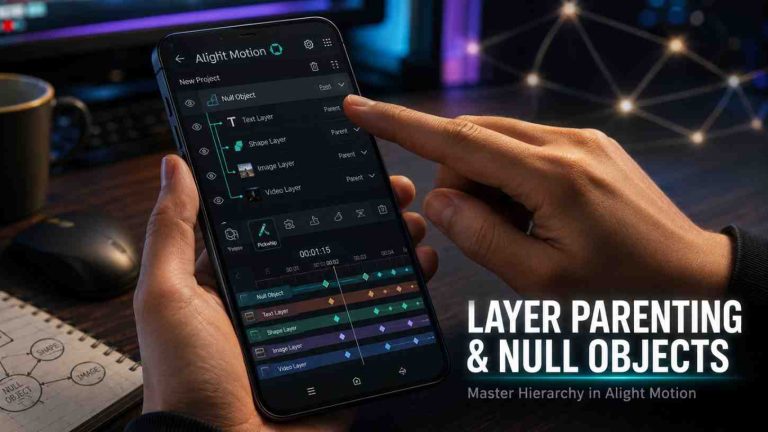
Layers: The Foundation of Everything in Alight Motion
If there’s one idea you need to internalize before anything else, it’s layers. Every clip, image, text box, shape, and audio editing track in your project exists as its own independent layer. Nothing meaningful happens in Alight Motion without understanding this concept first.
Layer Types
The app supports several layer types: video layers for your clips, image layers for photos or PNGs, shape layers for vector drawings like rectangles and circles, text layers for titles and captions, and audio layers for music and sound. You can also add solid color layers (handy for backgrounds and overlays) and null layers (useful for parenting animated elements together).
Stacking Order and Visibility
Layers behave like a stack of transparent sheets whatever sits higher in the list appears on top in the final video. You can drag layers up or down to reorder them, and each one has an eye-icon toggle that lets you hide it temporarily without deleting anything. That’s especially handy once you’re juggling a lot of overlapping elements.
Duplicating, Grouping, and Naming Layers
Need a second copy of something? Long-press a layer to find the duplicate option. For projects with a lot of moving parts, grouping related layers keeps the timeline manageable. And renaming your layers instead of leaving them as “Layer 1,” “Layer 2,” and so on makes a massive difference once a project balloons to twenty or thirty layers.
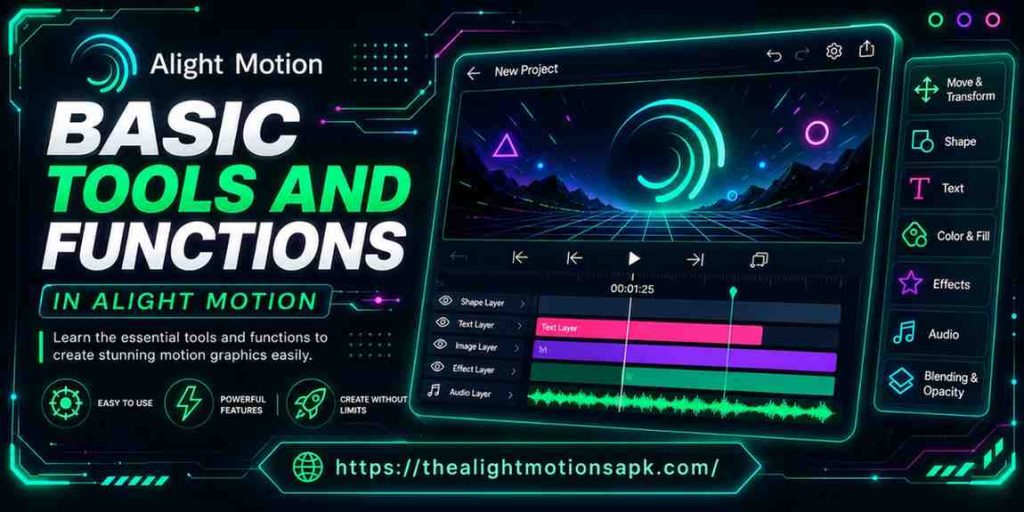
Core Editing Tools You’ll Use Constantly
These are the tools you’ll come back to in almost every single project, so it’s worth getting comfortable with them early.
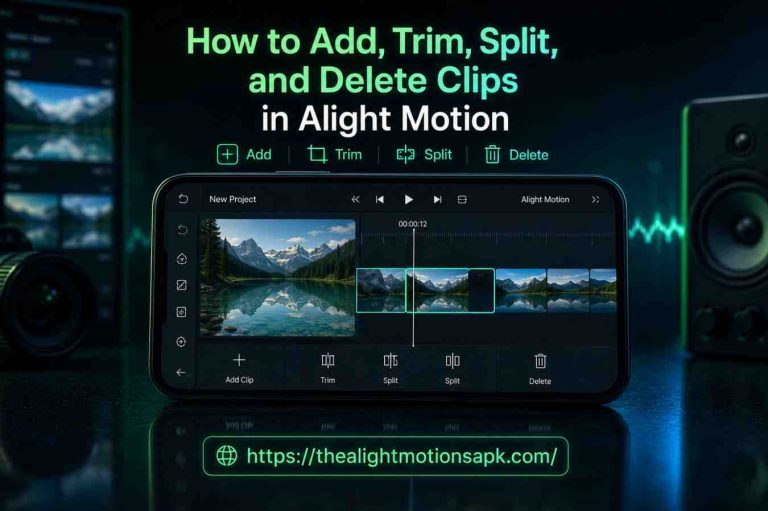
Trimming and Extending Clips
To trim a clip, select it on the timeline and drag either edge inward to shorten it, or outward (if there’s unused footage available) to extend it. Trimming is about as fundamental as editing gets it’s how you remove what you don’t need and keep what you do.
The Split Tool
Splitting cuts a layer into two pieces at the current playhead position in Basic Tools and Functions in Alight Motion. This is useful for removing a chunk from the middle of a clip (split, delete, then rejoin), applying different effects to different sections of the same clip, or lining up a cut precisely with a beat in your music. Position the playhead, select the layer, and tap split.
Transform Controls: Move, Rotate, Scale
Transform controls let you reposition, rotate, or resize any layer either by dragging and pinching directly in the preview, or by typing exact values into the properties panel for pixel-precise placement. These same properties can be keyframed, which is the basis for nearly every movement animation you’ll create, from text sliding in to a logo scaling up.
Copy, Duplicate, and Delete
Long-pressing a layer brings up copy, duplicate, and delete options. Copying lets you move content to a different point in time, duplicating creates an identical layer stacked right above the original, and deleting removes it entirely. Simple as they are, you’ll use these constantly.
Text and Typography Tools
Text shows up in nearly every kind of video, whether it’s a quick caption or a fully animated title sequence, and Alight Motion gives you a lot of control over both.
Adding and Editing Text
Tap the plus button and choose the text option to drop a text box onto your canvas. Tapping it opens the text editor, where you can type your content and adjust font, size, and alignment. Each project can hold as many independent text layers as you need.
Fonts, Color, Stroke, and Fill
Beyond basic font, size, and style choices (bold, italic, etc.), you can add an outline (stroke) around text with its own color and thickness, and control the fill using a solid color, a gradient, or even full transparency so only the stroke is visible. That alone opens up a wide range of looks without needing outside design software.
Per-Letter Animation
One of the standout text features is the ability to animate individual letters rather than an entire text block at once. This is what powers effects like letters dropping in one after another, bouncing into place, or spinning independently. Paired with easing curves, per-letter animation can rival what you’d expect from dedicated motion graphics software.
Shape Tools and Vector Graphics
Alight Motion is one of the few mobile apps offering real vector graphics meaning shapes stay crisp no matter how much you scale them, unlike a bitmap image that gets blurry when enlarged.
Basic Shapes: Rectangles, Circles, Polygons
The built-in shape tools let you quickly draw rectangles, circles, ellipses, and polygons, each customizable with fill color, stroke color and width, corner rounding, and opacity. These get used constantly for lower thirds, backgrounds, highlight boxes, and other decorative motion graphic elements.
The Pen Tool
For anything the basic shapes can’t produce, the pen tool lets you draw fully custom vector paths by placing anchor points that connect with straight or curved lines. It has a real learning curve, but it’s how you’d create custom arrows, irregular shapes, or animated line graphics.
Editing Paths
Once a shape exists, you can go back in and adjust individual anchor points moving them, adding new ones, removing others, or converting sharp corners into smooth curves. This level of path control is part of what makes Alight Motion genuinely useful for serious motion graphics work, not just basic editing.
Keyframe Animation The Engine Behind Everything
If there’s a single feature responsible for most of the polish you see in professional mobile edits, it’s keyframe animation. Getting comfortable with it will improve every single project you make afterward.
What Keyframes Actually Do
A keyframe records a property’s value at a specific moment in time. Set two keyframes for the same property position, for instance and Alight Motion automatically fills in every frame in between, creating smooth movement. Say you place text off-screen at frame 0 and centered at frame 30: the app generates a smooth slide between those points on its own. The same logic applies to scale, rotation, opacity, color, blur really any property at all.
Adding and Adjusting Keyframes
To set one, select a layer, open its properties panel, find the property you want to animate, and tap its keyframe (diamond) icon. That locks in a keyframe at the current playhead position. Move the playhead elsewhere, change the value, and a second keyframe is created automatically. Keyframes can be dragged along the timeline to retime them, or deleted outright.
Easing Curves
Left alone, animations move at a constant speed from start to finish which looks robotic, because real movement doesn’t behave that way. Easing curves fix this: Ease In starts slow and accelerates, Ease Out starts fast and decelerates, and Ease In-Out (by far the most commonly used) does a bit of both. This single adjustment is often the difference between an animation that looks amateur and one that looks genuinely professional.
Visual Effects and Enhancement Tools
Alight Motion ships with a sizeable effects library that can be applied to any layer, ranging from simple blur and color tweaks to elaborate distortion and particle systems. Effects are non-destructive, meaning you can tweak or remove them anytime without harming your original footage.
Blur Effects
There are a few blur types available: Gaussian blur for an even, smooth softening; directional blur for motion-blur-style effects; and radial blur, which spreads outward from a central point. Blur commonly gets used for softening backgrounds, faking depth of field, or as part of a transition.
Glow and Light Effects
The glow effect wraps a soft halo of light around bright areas of a layer, giving footage a dreamy or energetic feel depending on intensity. Separate light effects add lens flares, light leaks, and ray bursts popular choices for music videos, lyric videos, and gaming edits chasing a high-energy look.
Color Correction and Grading
Color tools cover brightness, contrast, saturation, hue rotation, and color balance, with a curves tool available for more precise tonal control. This is enough to build cinematic looks teal-and-orange grading, desaturated film tones, or punchy, saturated styles entirely on your phone. Good grading is often what separates a polished-looking video from a flat, raw-looking one.
Distortion and Stylistic Effects
Distortion tools (ripple, wave, bulge) let you warp footage for psychedelic effects or subtle visual interest. Stylistic options like pixelation, chromatic aberration (that signature RGB-split look), and grain round out the toolkit. As with most effects, restraint usually produces better results than piling them on.
Particle Systems
The particle generator can produce confetti, sparks, rain, dust, snow, and similar effects, with control over emission rate, particle size, velocity, direction, and lifespan. Combined with blending modes, particles are responsible for some of the most eye-catching visuals possible in mobile editing.
Blending Modes
Blending modes change how a layer’s pixels mix with whatever sits beneath it, rather than simply sitting on top opaquely.
How the Common Modes Work
Screen brightens by adding light great for glows and light leaks. Multiply darkens, making it useful for shadows and overlays. Overlay boosts contrast and saturation. Add sums pixel values for an intense glow. Soft Light gives a gentler contrast lift. Each mode produces a distinct effect, so experimenting is genuinely the fastest way to understand them.
Practical Applications
A common trick: take a fire or smoke animation shot on a black background, switch it to Screen mode, and the black disappears entirely, leaving only the fire or smoke visible over your footage a technique used constantly when working with overlay clips. Multiply, meanwhile, is the go-to for shadows; placing a dark gradient layer set to Multiply produces a natural-looking vignette.
Masking and Reveal Effects
Masks let you selectively show or hide parts of a layer without touching the rest of the project useful for everything from a basic crop to an elaborate reveal animation.
Shape Masks vs. Track Mattes
A shape mask cuts directly into a layer using a shape you draw yourself. A track matte instead uses a separate layer to define visibility wherever that matte layer has content, the layer beneath becomes visible through it. Track mattes are more flexible since the matte can be animated independently, but shape masks are faster for simple, static shapes.
Building Reveal Animations
Animate a mask say, a rectangle growing left to right via keyframes and you get a wipe-style reveal where content appears progressively. This combination of masking and keyframes underpins a huge amount of motion graphics work, from text reveals to logo animations to scene transitions.
Audio Editing and Music Syncing
Strong audio is arguably half of what makes a video work, and Alight Motion gives you the tools to sync edits tightly to music essential for TikTok and Reels content where the soundtrack often drives the entire edit.
Importing Audio
Audio files can be imported directly from your device, with support for MP3, WAV, and AAC. Once imported, audio appears as its own timeline layer complete with a waveform display, which is invaluable for lining up cuts and animations with specific beats.
Volume, Fade In, and Fade Out
Each audio layer has independent volume control, and that volume can be keyframed just like any other property useful for fading music in or out, or ducking it under a voiceover. The same easing principles that apply to motion keyframes apply here too.
Syncing to the Beat
Because the waveform shows you exactly where drum hits and bass drops land, lining up cuts or animations to those peaks becomes a fairly visual, intuitive process. For anything highly sync-dependent, zooming further into the timeline helps nail frame-accurate timing.
Speed Controls: Slow Motion, Fast Motion, and Ramping
Speed manipulation is one of the most-used techniques in mobile editing in Basic Tools and Functions in Alight Motion, and Alight Motion handles it well.
Basic Slow Motion and Fast Motion
Selecting a clip and opening its speed controls lets you set a specific multiplier 0.5x for half speed, 2x for double speed, and so on. Slow motion looks best on footage originally shot at 60fps or higher; halving 60fps footage gives smooth results, while halving 30fps footage tends to look choppy.
Speed Ramping
Speed ramping gradually shifting speed within a single clip is a hallmark of cinematic and music-video-style edits. It’s achieved by keyframing the speed property itself: normal speed at one point, a dramatic slowdown at another, then back to normal again. The result is footage that flows naturally, hits a dramatic slow-motion beat, and then snaps back to speed.
Chroma Key and Green Screen Compositing
Chroma key lets you swap out a solid-color background for any footage or image the same basic technique behind weather broadcasts and virtual YouTube sets.
Removing a Green Screen Background
The chroma key effect lives in the effects library. Apply it to footage shot in front of a green (or blue) screen, then use the color picker to select the background color you want removed. You’ll typically need to fine-tune threshold and softness settings to get a clean edge without green fringing around your subject.
Building a Convincing Composite
Once the background is gone, drop your new background footage or image onto a layer beneath your subject. Adding matching shadows, color-grading both layers to feel consistent, and using blending modes where appropriate all help the composite read as seamless rather than obviously green-screened.
Presets, XML Files, and Community Templates
Part of what’s made Alight Motion so popular is the active community built around shareable presets and XML project templates.
Importing and Using Presets
A preset is a saved effect configuration that can be applied with a single tap. After downloading a preset shared by another creator, you import it through Alight Motion’s import feature, after which it appears in your effects panel ready to use a huge time-saver for complex, multi-effect combinations.
Working With XML Templates
XML files are essentially complete project files full of layers, keyframes, effects, and timing already built out. Opening one gives you a ready-made animation that you can swap your own footage and text into. These are widely shared for popular effects like glitch transitions, stylized text reveals, and complex scene changes.
Finding Presets and Templates
YouTube tutorials frequently link preset and XML downloads in their descriptions, and Telegram groups dedicated to Alight Motion especially active across South Asia share new presets constantly. The app’s own built-in community section also has a growing library. As with any downloaded file, it’s worth sticking to trusted creators rather than random unknown sources.
Exporting: Best Settings for Every Platform
After all the editing work, getting export settings right matters more than people expect. The wrong choice can mean blurry footage, bloated file sizes, or a video that looks great on your phone but rough once uploaded.
Resolution, Frame Rate, and Format
Alight Motion exports to MP4 (the standard for social platforms), GIF for short loops, and with the right setup video carrying an alpha channel for transparent backgrounds. For most content, 1080p at 30fps in MP4 is the right call, with bit rate scaled up as high as your device can comfortably handle for the best quality.
Recommended Settings by Platform
- YouTube (standard): 1920×1080, 30fps, MP4, highest quality setting
- YouTube (cinematic/4K): 3840×2160, 30fps, MP4
- TikTok: 1080×1920, 30fps, MP4, high quality
- Instagram Reels: 1080×1920, 30fps, MP4, high quality
- Instagram square post: 1080×1080, 30fps, MP4
A useful rule of thumb: always export at the highest quality your device allows and let the platform’s own compression handle the rest. Exporting at a lower quality to save space tends to backfire, since platform compression squeezes already-low-quality footage even further.
Pro Tips, Common Mistakes, and a Learning Roadmap
With the core tools covered, here are a few more advanced ideas, some pitfalls worth avoiding, and a rough path for building your skills over time.
Nested Compositions
Nesting lets you treat a whole group of layers as a single unit useful for applying one effect across multiple layers at once, keeping a complex project organized, or building reusable animation modules. If you ever find yourself wanting the same effect applied to ten different layers, nesting them first is far more efficient than repeating the effect ten times.
Templates and Performance Optimization
Saving your go-to project setup preferred resolution, frame rate, base layer structure as a template speeds up starting new projects. For performance, turning off effects you’re not actively previewing and working with lower-resolution proxy footage can both help on slower devices, as can rendering previews in sections rather than across the whole timeline.
A Solid Color Grading Workflow
A reliable grading order starts with primary correction fixing exposure and white balance so footage looks clean and neutral. From there, secondary correction introduces creative choices around color temperature, shadows, and highlights to set a mood. Finishing with a subtle vignette and film grain rounds things out. Following that order tends to produce far better results than randomly nudging sliders around.
Mistakes Beginners Commonly Make
The single most common mistake is stacking too many effects without really understanding what each one does, which usually produces a cluttered, amateur-looking result rather than an impressive one one well-chosen effect beats ten half-understood ones.
Leaving layers unnamed is another frequent issue; once a project hits twenty-plus layers all labeled “Layer 1,” “Layer 2,” finding anything becomes painful. Naming layers from the start pays off quickly.
Skipping easing on keyframes is the third big one. Linear motion looks stiff and robotic, while even a basic Ease In-Out applied consistently makes an immediate, noticeable difference in how polished an edit feels.
A Rough Learning Path
If you’re starting from zero, focus on one thing at a time. Spend the first week just getting comfortable with the interface, project setup, layers, and basic trim/transform tools. Week two, dig into keyframe animation practice animating position, scale, and opacity until it feels intuitive. Week three, explore effects and color grading. By week four, try putting everything together into one complete short video.
Once that foundation feels solid, move on to masking and track mattes, then chroma key compositing and blending modes, and finally more advanced territory like nested compositions and speed ramping. Pacing it out this way avoids the overwhelm that comes from trying to absorb everything at once.
Frequently Asked Questions
Is Alight Motion completely free to use?
Yes! the free version can be downloaded at no cost, though exports carry a watermark and some premium effects and fonts stay locked. A paid subscription removes the watermark and unlocks everything.
Which devices does it run on?
Android 5.0+ and iOS 13+, with at least 4GB of RAM recommended for a smooth experience. Most mid-range and flagship phones from the past three to four years handle it comfortably.
What are the most important basic tools to learn first?
The layer system, trim and split tools, transform controls, and keyframe animation. These four areas form the foundation for nearly everything else in the app.
How do keyframes actually work?
They record a property’s value at a given moment in time. Set two keyframes with different values, and Alight Motion automatically animates the transition between them an opacity keyframe at 0% on frame 0 and 100% on frame 20, for example, creates a fade-in. This works for virtually any property.
Can it be used for professional client work?
Yes! plenty of creators use it for paid social media content, music video editing, animated logos, and more. The toolset is capable of genuinely professional results when used well.
How do presets and XML files get imported?
Download the file to your device, then use Alight Motion’s import option to bring it into your project library. Presets land in your effects panel ready to apply; XML files open as complete, ready-made projects.
What are the best export settings for YouTube and TikTok?
YouTube: 1920×1080 at 30fps, MP4, highest quality. TikTok and Reels: 1080×1920 (vertical) at 30fps, MP4, high quality. In general, export as high quality as possible and let the platform’s compression do the rest.
Is it better than CapCut for beginners?
CapCut is easier to pick up initially since it’s simpler and more automated. Alight Motion offers far more creative control and is the stronger long-term choice for anyone serious about growing as an editor. Many creators start on CapCut and graduate to Alight Motion, while others jump straight in and put in the time to learn it properly.
Conclusion
Alight Motion remains one of the most genuinely impressive tools available to mobile creators right now. The fundamentals covered here in Basic Tools and Functions in Alight Motion layers, keyframe animation, effects, masking, blending modes, audio editing, and exporting are the building blocks for almost anything you’ll ever make with the app.
The learning curve is real, but it pays off. Every bit of time spent understanding how Alight Motion works shows up directly in the quality and range of what you’re able to create. Start with the basics, build steadily, and don’t be afraid to experiment the fastest way to actually learn the app is simply opening a project and trying things out.
Whether the goal is TikTok content, a YouTube channel, Instagram Reels, or a portfolio of motion graphics work, Alight Motion now puts tools in your hands that simply weren’t possible on a phone a few years ago and this guide has covered everything needed to get started with confidence.