Special Effects and VFX in Alight Motion – Complete Guide for Cinematic Video Editing (2026)
My first real VFX edit was a complete mess. I tried to recreate one of those Marvel-style energy blasts I saw in a YouTube tutorial, and the result looked like a flickering blob of yellow paint. I almost gave up that day. But something kept me curious, and a few weeks later, after slowly understanding how layers, blend modes, and timing worked together, I made a similar effect that actually fooled people. A friend asked me which desktop software I used. He could not believe it was all done on a phone.
Special effects and VFX in Alight Motion Pro are honestly the closest thing mobile editors have to real desktop motion design software. The app gives you the layers, blending modes, masking, camera controls, and keyframe systems needed to recreate effects that previously required expensive computers. The only thing standing between you and cinematic VFX is understanding how the tools fit together. Once that clicks, the creative ceiling rises dramatically.
This guide is built from three years of using Alight Motion for client projects, viral reels, gaming montages, and AMV edits. I will walk you through what VFX really are, the types you can create, the exact step-by-step workflow I use, and the pro techniques that separate amateur effects from edits that actually fool viewers. Beginners, content creators, and experienced editors moving to mobile will all find practical value here.
What Are Special Effects and VFX in Alight Motion?
Before we dive into techniques, let me clear up what special effects and VFX actually mean. The terms get used interchangeably online, but they describe slightly different things.
Understanding Visual Effects in Video Editing
Visual effects, or VFX, are anything added to your footage that was not captured in the original recording. Smoke, fire, glowing energy, color shifts, glitch distortions, lens flares, particle systems, and animated overlays all count as VFX. They exist to enhance, transform, or completely replace parts of the original shot.
Difference Between Special Effects and VFX
Special effects traditionally happen during filming, like real explosions or smoke machines on set. VFX are added in post-production using software. On mobile, everything happens digitally inside the app, so we use the terms interchangeably. The core idea is the same. Add something visual to make the shot stronger.
How VFX Work in Alight Motion?
Alight Motion treats VFX as effects applied to layers. You stack layers, blend them with the layer underneath, animate properties with keyframes, and combine multiple effects until the final look matches your vision. The same logic used in After Effects, just inside a mobile-friendly interface.
Why Creators Use VFX in Social Media Content?
Effects grab attention. The algorithm rewards content that stops the scroll. A reel with a clean glitch transition or a glowing energy effect almost always outperforms a flat cut. I have tested this on my own accounts repeatedly, and the data is consistent. VFX content holds viewers longer.
Types of Special Effects and VFX in Alight Motion
Knowing what kinds of effects you can build helps you pick the right tool for each project. Here is what each category does and when I reach for it.
Motion Blur Effects
Motion blur smears fast-moving objects across frames the way real cameras do. It instantly makes computer-generated motion look like filmed footage. I use motion blur on almost every project that involves animated layers.
Glow and Lighting Effects
Glow adds that magical bloom you see on neon signs, magical objects, and cinematic light sources. Combined with color grading, glow effects turn ordinary footage into hero shots.
Particle and Smoke Effects
Particle systems simulate dust, sparks, magical effects, and atmospheric haze. Smoke effects work well for dramatic reveals, transitions, and adding mood. Alight Motion handles particles surprisingly well for a mobile app.
Fire and Explosion Effects
Fire and explosion overlays are usually added as pre-made video assets blended into your footage. Combined with proper color grading and shake effects, they sell the illusion completely. Gaming editors and AMV creators rely on these constantly.
Glitch and Distortion Effects
Glitch effects mimic digital interference, RGB splits, scan lines, and warping. They are perfect for cyberpunk aesthetics, music video transitions, and dramatic moments where you want chaos.
Cinematic Color Effects
Cinematic looks come from color grading, light leaks, film grain, and subtle vignettes. These effects do not draw attention to themselves but raise the perceived quality of your entire edit.
3D and Camera Effects
Pair [Internal Link: 3D Effects in Alight Motion] with [Internal Link: Camera Objects in Alight Motion] for fully cinematic three-dimensional scenes. Depth, parallax, and dynamic camera moves elevate flat footage into immersive sequences.
Text Animation Effects
Animated text with glow, motion blur, and reveal effects creates the kind of title sequences you see in streaming intros. Bold typography combined with motion design feels professional and on-trend in 2026.
Tools Required for Creating VFX in Alight Motion
Before opening the effects panel, get comfortable with these supporting tools. They are the foundation of every VFX workflow.
Layers and Blending Modes
Layers stack on top of each other, and blend modes control how each layer interacts with the one below. Screen mode is great for glows and lights. Multiply is perfect for shadows. Add intensifies bright elements. Master blend modes and half of VFX becomes natural.
Keyframe Animation
Keyframes bring static effects to life. They record changes over time so your effects can grow, fade, move, and react. Without keyframes, VFX would feel like stickers slapped onto your footage.
Masking Tools
The [Internal Link: Masking Feature in Alight Motion] is essential for placing effects only where you want them. Mask out a glow behind a person, hide a particle effect inside a shape, or reveal text through a custom path. Masking unlocks precise VFX control.
Camera Objects and Motion Controls
Camera objects add depth and cinematic motion to flat scenes. Combined with parented layers, they create the parallax that turns photo sequences into mini-movies.
Effects Panel and Presets
Alight Motion’s effects panel contains the building blocks for nearly every VFX scenario. Blur, glow, distortion, color correction, displacement, and many more effects live here. Combine them creatively for unique results.
Color Adjustment Tools
Color tools include brightness, contrast, saturation, levels, and curves. Proper color grading is what makes VFX feel integrated with your footage rather than sitting on top like a sticker.
How to Create Special Effects and VFX in Alight Motion? (Step-by-Step)
This is the workflow I follow on every VFX project. Open the app and follow along.
Step 1: Create a New Project
Tap the plus icon and start a fresh project. Match aspect ratio to your destination, 9:16 for Reels and Shorts, 16:9 for YouTube. Use 60 fps because most VFX benefit from smoother motion.
Step 2: Import Video Clips and Assets
Bring in your base footage along with any overlay assets you plan to use, like particle videos, smoke clips, or light leaks. Higher resolution sources always produce better results. I source most of my overlays from free packs and royalty-free libraries.
Step 3: Add Effects Layers
Stack your effect overlays above your base footage. Set their blend mode to Screen or Add for light-based effects, or Multiply for darker effects. The blend mode you pick changes everything about how the effect integrates.
Step 4: Use Keyframes for Animation
Animate properties like opacity, scale, position, or rotation using keyframes. A particle effect that grows and fades looks far more natural than one that appears statically. Pair with easing curves for organic motion.
Step 5: Apply Motion Blur and Glow
Add motion blur to fast-moving elements and glow to bright sources. These two effects alone separate amateur VFX from professional ones. Apply them sparingly and intentionally rather than on every layer.
Step 6: Add Transitions and Camera Movement
Pair your VFX with cinematic camera moves and well-timed transitions. A glitch effect during a beat drop or a zoom that lands on a glow flash feels intentional and exciting.
Step 7: Adjust Colors and Lighting
Color-grade your entire scene as a single piece. Match the colors of your effects to your base footage. Mismatched lighting is the most common reason VFX look fake, so spend time getting this right.
Step 8: Preview and Export the Final Video
Play through your full timeline at high preview quality. Catch timing issues and color mismatches before exporting. When everything looks right, follow proper [Internal Link: Exporting and Rendering Options in Alight Motion for the cleanest final output.
Best VFX Techniques in Alight Motion
After exporting hundreds of VFX projects, these are the techniques I reach for most often. Each one delivers consistently strong results.
Creating Cinematic Zoom Effects
Animate scale from 100 percent to 110 percent over three to four seconds. Add slight motion blur to the zoom. The result is the Ken Burns-style slow push that makes static shots feel alive.
Adding Smooth Camera Shake
Use position keyframes with small random offsets to simulate handheld movement. Keep the shake subtle. Heavy shake feels artificial unless the scene demands it, like during an explosion.
Using Parallax for Depth
Separate foreground and background layers, then animate them at different speeds during a camera move. The mismatch creates depth that makes flat photos feel three-dimensional.
Creating Slow Motion Effects
Adjust playback speed on individual layers to slow down dramatic moments. Pair with motion blur for that cinematic floating quality. Slow motion is one of the easiest ways to add emotional weight to a shot.
Building Dynamic Scene Transitions
Combine masks, scale animations, and motion blur to build transitions that feel like single continuous shots. A zoom into a bright spot that becomes the next scene’s opening is a classic example.
Combining Multiple Effects Naturally
Stack effects in a way that mimics how real cameras capture light. Bright objects should glow. Fast motion should blur. Edges of light sources should bloom. Following physical logic keeps VFX believable.
Advanced VFX Techniques in Alight Motion
Once basics feel comfortable, these techniques will push your work into truly professional territory.
Multi-Layer VFX Compositions
Build complex scenes with eight to twelve layers, each handling a specific element like base footage, smoke, glow, color grading, and overlays. The combined result feels rich and intentional.
Combining VFX with 3D Effects
Pair [Internal Link: 3D Effects in Alight Motion] with cinematic VFX for fully immersive scenes. Three-dimensional depth combined with particle effects creates the kind of edits that look impossible on mobile.
Advanced Motion Tracking Techniques
Alight Motion does not offer automatic motion tracking, but careful manual keyframing produces excellent results. Animate position frame by frame to attach effects to moving subjects. Patience pays off here.
Creating Realistic Cinematic Scenes
Match lighting, color temperature, and motion blur across every layer in the scene. Consistency is what makes the final composition feel like it came from a real camera, not a collage of stickers.
Using Null Objects and Parenting
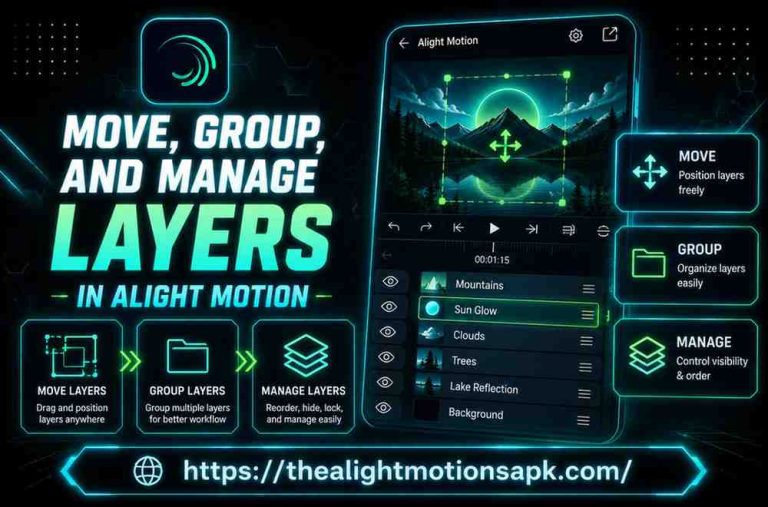
[Internal Link: Layer Parenting & Null Objects in Alight Motion] becomes essential when you have ten or more layers in a VFX scene. Group related elements under nulls and animate them collectively for cleaner workflows.
Professional Editing Workflow Tips
Save each finished VFX setup as a preset for future use. Build your own library of go-to effects. Over time, this preset library saves hours on every project and lets you focus on creative decisions rather than rebuilding from scratch.
Special Effects and Animation in Alight Motion
VFX without proper animation falls flat. These techniques bring effects to life with the kind of motion that feels intentional and professional.
Animating VFX with Keyframes
Every property of every effect can be animated. Opacity, scale, rotation, blur intensity, and color all support keyframes. Use this freedom to make effects react and breathe rather than sit motionless.
Syncing Effects with Motion
Match effect timing to subject motion. A glow that fades as a character moves away feels grounded. A particle burst that triggers on impact feels physical. These small details sell the illusion of integrated VFX.
Combining Effects with Text Animation
Animated text with glow, motion blur, and shake effects produces broadcast-quality title sequences. Pair with sound design for maximum impact.
Smooth Velocity and Easing Techniques
Linear motion ruins even the best VFX. Always apply easing curves to keyframes. Pull the velocity graph into an S-shape for natural acceleration and deceleration. This single habit upgrades every animation.
Creating Loop Animations
Some effects work best as continuous loops, like rotating particles or pulsing glows. Set keyframes that return to the starting value and the animation loops seamlessly. Perfect for backgrounds and ambient elements.
Color Grading for Special Effects and VFX
Color grading is what unifies your VFX with your footage. Skip this step and your effects will always look stuck on rather than integrated.
Basic Color Correction Techniques
Start with brightness, contrast, and saturation adjustments to balance your base shot. Once the foundation looks clean, your effects have a stable scene to integrate with.
Cinematic Color Grading Styles
Cool blue shadows with warm orange highlights produce the classic Hollywood look. Teal and orange is the most popular palette for a reason. It flatters skin tones and creates visual depth.
Matching Colors Across Scenes
Multi-scene edits need consistent color treatment. Apply the same color grade across all clips or use color correction layers above multiple clips for unified looks.
Using Glow and Lighting for Better Mood
Glow effects placed strategically draw the eye and add atmosphere. Combined with color grading, glow becomes one of the most powerful mood-setting tools in mobile editing.
Enhancing Visual Depth with Color
Darker, cooler colors recede. Brighter, warmer colors come forward. Use this principle to push backgrounds back and pull subjects forward, creating depth without changing layer positions.
Sound Design and Audio-Reactive Effects
Sound is the secret half of every great VFX edit. Without proper audio, even the best visual effects feel hollow.
Adding Sound Effects to VFX
Every visual effect deserves a matching sound. Whooshes for transitions, impacts for hits, glows often need ambient drones. Free libraries like FreeSound and YouTube’s audio library are great sources.
Syncing Visual Effects with Music Beats
Time your effects to land on music beats. A flash on a kick drum or a transition on a snare hit feels intentional and rhythmic. Most viral edits live and die by beat synchronization.
Creating Audio-Reactive Animations
Set keyframes that respond to the rhythm of your soundtrack. A glow that pulses with the bass or a shake that triggers on impacts produces edits that feel alive.
Enhancing Cinematic Impact with Sound Design
Layer multiple sounds for richer audio. A single explosion might have a low rumble, a sharp crack, and a debris fade-out. Three sounds combined sound far more cinematic than one isolated effect.
Best Uses of Special Effects and VFX
If you are wondering what kinds of projects benefit most from VFX, here are the use cases that consistently perform well.
TikTok and Instagram Reels
Reels and TikTok thrive on visual surprise. Glitch transitions, particle bursts, and animated text are some of the strongest hooks for short-form content. I have seen retention rates jump significantly when VFX hooks are added to opening seconds.
Gaming and AMV Edits
The gaming community uses heavy VFX for highlight reels and montages. AMVs lean even harder on cinematic effects synced to music. Both communities are excellent training grounds for mastering VFX workflows.
YouTube Intro Videos
Brand and channel intros built around VFX feel intentional and professional. A clean intro with motion blur, glow, and animated text builds instant credibility with new viewers.
Cinematic Short Films
Short films and storytelling content benefit from subtle, narrative-supporting VFX. Color grading, atmospheric particles, and depth effects elevate phone-shot footage into something genuinely cinematic.
Promotional and Brand Videos
Small businesses pay well for promotional videos with professional effects. Product reveals with light leaks, animated logos, and cinematic color grading consistently outperform flat ads.
Common VFX Mistakes to Avoid
I made every one of these mistakes during my first year. Save yourself the trouble.
Overusing Effects in One Scene
Stacking ten effects on every shot kills your edit. Restraint is the most professional choice you can make. Pick one or two hero effects per scene and let them breathe.
Unnatural Motion and Timing
Linear keyframes produce robotic motion. Cameras and natural objects accelerate and decelerate. Apply easing curves to every animated effect so it feels organic.
Poor Color Matching
Mismatched colors between VFX and footage are the biggest giveaway that effects were added in post. Spend extra time matching color temperature, saturation, and luminance across all layers.
Excessive Motion Blur
Motion blur on every layer makes your edit feel sluggish. Use it only where it makes sense, on fast-moving elements and dynamic transitions.
Low-Quality Assets and Clips
Effects multiply the visual quality of your source material. Pixelated footage with VFX looks worse than clean footage without effects. Always start with the best possible source assets.
Weak Audio Synchronization
Visual effects without matching audio feel incomplete. Even the best glitch transition falls flat without a sharp sound design moment to back it up.
Tips for Creating Professional VFX in Alight Motion
These habits separate hobbyist edits from professional VFX work. They take seconds to follow and dramatically raise your output quality.
Keep Effects Smooth and Natural
Reference real footage when building effects. How does light bloom on a real lens? How does smoke move in real wind? Mimicking reality makes VFX believable.
Use High-Quality Video Assets
Source overlays from premium-quality VFX packs or 4K footage libraries. Low-resolution overlays betray your edit instantly. Free sites like Pexels, Mixkit, and Videvo have surprisingly good options.
Organize Layers Properly
Name your layers clearly. Glow Top, Smoke Mid, Color Grade. Future you, opening this project weeks later, will save hours through good organization.
Use Subtle Effects for Better Realism
Subtle effects almost always read as more professional than extreme ones. Reduce opacity, soften intensity, and let restraint guide your decisions.
Preview Effects Before Exporting
Play through the full timeline at high preview quality before tapping export. Catching issues now saves you from re-rendering long projects later.
Maintain Consistent Frame Rates
Match your project frame rate to your source footage. Mismatches cause subtle stutter that becomes obvious once effects are added on top.
Exporting and Rendering VFX Projects
VFX-heavy projects need specific export attention. Skipping this care destroys the work you put into building the effects.
Best Export Settings for VFX Videos
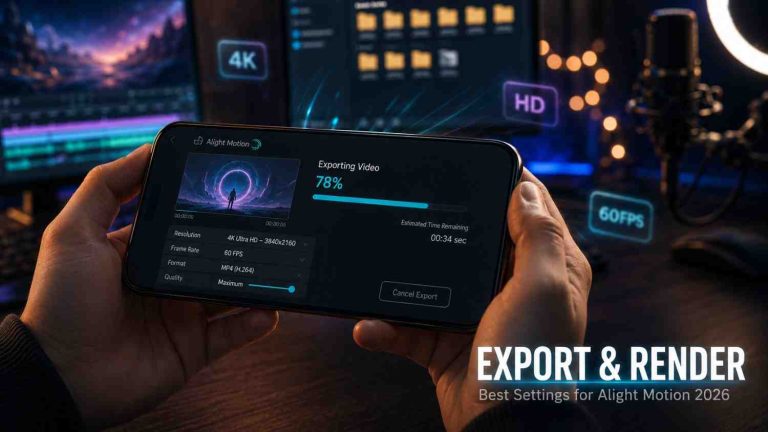
For VFX-heavy content, export at 1080p minimum, 60 fps, MP4 with H.264 codec, and bitrate of 25 Mbps or higher. Lower bitrates destroy the smooth motion blur and fine detail in your effects.
Recommended FPS and Resolution
60 fps is the standard for cinematic VFX. 4K at 60 fps is even better if your device supports it. Higher frame rates preserve the smooth motion that makes VFX feel professional rather than choppy.
Maintaining Effect Quality After Export
Preview your exported file at full size before delivering or uploading. Phone screens hide compression issues that become obvious on larger displays. Catching problems early saves embarrassment.
Reducing Lag During Rendering
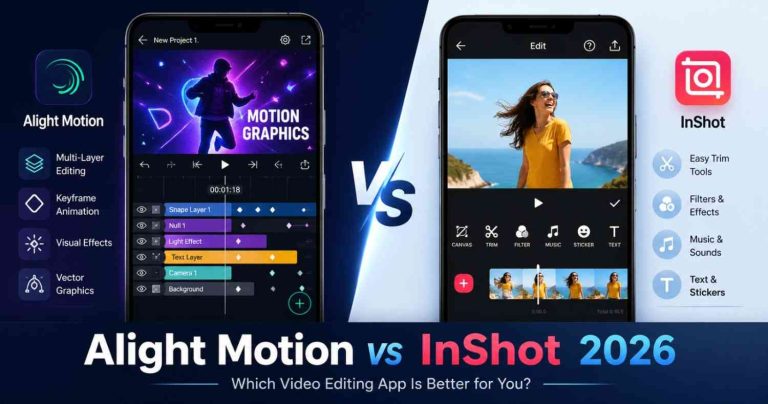
Close background apps before export. Free up storage. Plug in your charger to avoid thermal throttling. These small habits prevent the export crashes that happen on heavy VFX projects. This is one area where comparisons like Alight Motion vs InShot clearly favor Alight Motion InShot handles basic edits well, but it lacks the layer-heavy VFX rendering pipeline that Alight Motion is built for, which is exactly why thermal and memory management matters more here.
Best Formats for Social Media Uploads
MP4 with H.264 is universal and works on every platform. Follow proper [Internal Link: Exporting and Rendering Options in Alight Motion] settings for each destination to preserve VFX quality through platform compression.
Troubleshooting VFX Problems in Alight Motion
Even careful workflows hit problems. Here are the most common VFX issues and how I solve them.
Effects Not Rendering Properly
If effects look fine in preview but break on export, try clearing the app cache and restarting. Sometimes a fresh start solves rendering glitches that defy logical explanation.
Lag While Editing Heavy Projects
Lag during editing means too many active layers or effects. Lower preview quality, hide unused layers, and split your project into shorter sections if needed.
Export Crashes and Errors
Export crashes usually come from insufficient storage, low RAM, or thermal throttling. Free up space, close apps, and plug in your charger before retrying.
Fixing Blurry Visual Effects
Blurry effects after export usually mean low bitrate. Increase your export bitrate to at least 25 Mbps for VFX-heavy 1080p projects.
Solving Sync Issues Between Audio and Effects
If audio drifts out of sync with visual effects, check your project frame rate matches your audio sample rate. Mismatched rates produce subtle drift that becomes obvious over long timelines.
Frequently Asked Questions
What are VFX in Alight Motion?
VFX in Alight Motion are visual effects added during post-production, including motion blur, glow, particles, color grading, glitch, fire, smoke, and animated overlays. These effects are applied as layers with keyframes and blending modes to enhance or transform your footage.
Can beginners create cinematic effects in Alight Motion?
Yes, beginners can produce cinematic effects within their first month of practice. Start with simple effects like color grading and motion blur, then progress to particles, glow, and multi-layer compositions as your confidence grows.
Which effects are best for reels and shorts?
Glitch transitions, glow effects, motion blur, color grading, and particle overlays consistently perform well on Reels and Shorts. These effects grab attention in the first second and hold viewers longer than flat edits.
How do you add motion blur in Alight Motion?
Select your layer, open the effects panel, find Motion Blur, and enable it. Adjust intensity to match your motion speed. Higher intensity for fast movement, lower for subtle motion. Animate intensity for natural results.
Why do VFX projects lag on mobile devices?
Lag comes from too many high-resolution layers, excessive effects per layer, or limited device RAM. Close background apps, lower preview quality during editing, and split heavy projects into smaller sections to maintain smooth performance.
What export settings are best for VFX videos?
Export at 1080p minimum, 60 fps, MP4 format with H.264 codec, and bitrate of 25 Mbps or higher. These settings preserve smooth motion blur, glow, and fine detail through platform compression.
Can Alight Motion create professional-level effects?
Yes, Alight Motion can produce professional-quality VFX comparable to entry-level desktop software. With practice and the right techniques, mobile editors regularly deliver client work that rivals After Effects projects.
Are VFX features available in the free version of Alight Motion?
Yes, most VFX features are available in the free version, including layers, effects panel, keyframes, masking, and blending modes. Premium adds higher export resolutions, watermark removal, and additional preset packs.
Final Thoughts
Looking back, learning to create special effects and VFX in Alight Motion was the moment my edits transformed from mobile videos into actual visual storytelling. The first viral reel I ever made depended heavily on a simple glitch transition timed perfectly to a beat. That single technique opened doors I did not know existed. Today, VFX are part of nearly every project I deliver, and the difference shows in retention, engagement, and client satisfaction.
Start with one effect at a time. Master motion blur this week, glow next week, particles the week after. Within a few months of consistent practice, you will have a toolkit that lets you tackle nearly any creative idea that comes to mind. The cinematic edits you used to admire become projects you can build yourself.
VFX reward curiosity and patience. The more you experiment, the more you discover combinations no tutorial would have shown you. If this guide helped you, share it with another editor still relying on basic cuts and transitions. There is no reason to stay flat when this much creative power lives inside the app on your phone.