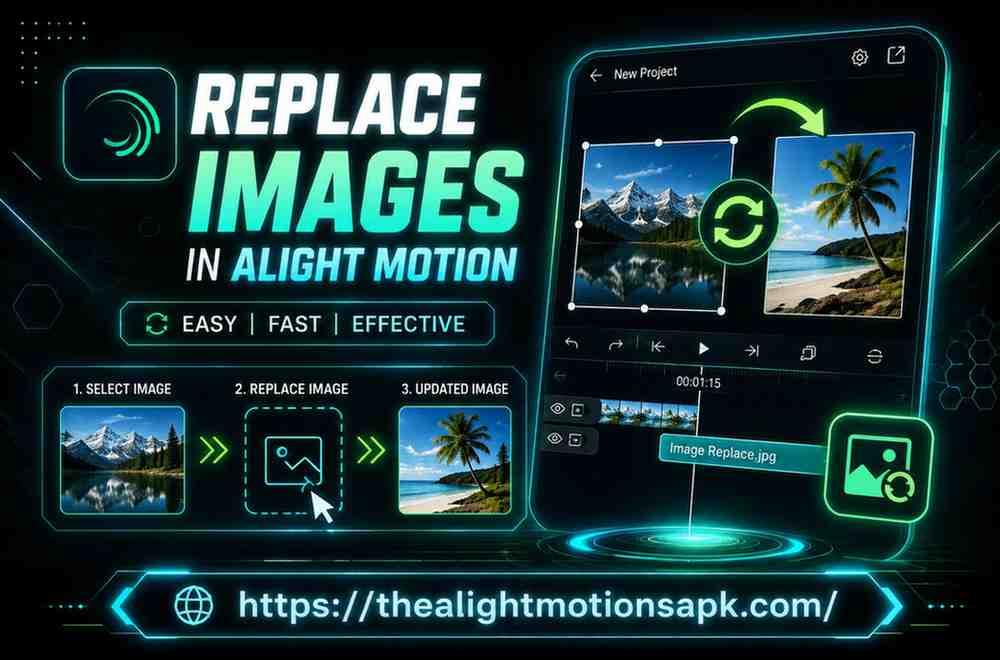
How to Replace Images in Alight Motion? (Step-by-Step Guide) 2026
If you have ever spent hours building an Alight Motion Mod APK project and then realized you needed to swap out one image without redoing everything from scratch you already know exactly why this skill matters. I have been there.
You create a clean template, add all your keyframes, set up the effects just the way you want them in Replace Images in Alight Motion, and then a client sends you a new logo or you simply want to reuse the same project for a different video. The last thing you want is to start over.
The good news is that replacing images in Alight Motion is not complicated once you understand how the layers and media work together. In this guide, I am walking you through every method, every step, and every fix exactly the way I learned it through actually using this app.
Why Replacing Images in Alight Motion Matters?
Most people who edit videos regularly end up building a library of templates. You make one great intro, one clean outro, one product showcase and then you reuse them for every new project. That workflow only works if you can quickly swap the visuals without breaking everything else.
Reusing Existing Projects and Templates
When you replace an image in an existing Alight Motion project, you keep all your keyframes, motion paths, transitions, and effects exactly in place. The animation does not change only the visual content inside it does. This saves you from rebuilding the same project over and over again for different clients or different content.
Updating Content Without Starting From Scratch
Say you created a product video for a phone launch. Same layout, same animation style, new phone model next month. Instead of rebuilding the whole project, you just replace the product image. The motion stays, the text style stays, everything stays only the image changes.
Maintaining Better Workflow and Consistency
When your entire team or your personal portfolio uses consistent templates, your content looks more professional. Replacing images inside a fixed template keeps your branding tight and your output speed fast. I personally do this for every event highlight video same motion template, different photos each time.
Things to Prepare Before Replacing an Image
Jumping straight into the replacement without checking a few things first can cause headaches later. Here is what to do before you touch any layer.
Check Image Resolution and Aspect Ratio
The new image you want to use should ideally match the resolution and aspect ratio of the original. If the original was 1080×1080 and you replace it with a 1920×1080 image, it is going to look stretched or cropped. Always resize your replacement image before importing it into Alight Motion to save time later.
Organize Layers and Timeline
Before you start digging through layers looking for the right image, take a minute to label and organize your timeline. In complex projects with 20 or 30 layers, finding the right image layer without labels takes much longer than it should. Tap and hold a layer to rename it if you haven’t already.
Identify Groups, Masks, and Effects
If your image sits inside a group layer or has a mask applied to it, you need to know that before you start replacing. Replacing a masked image without checking the mask first will shift the visual position and the effect will look completely different. Open the group, check what is inside, and note any effects stacked on top.
How to Replace Images in Alight Motion? Step by Step
This is the core process. Follow these steps in order and you will not break your animations.
Open Your Existing Project
Open Alight Motion and tap on your project from the main dashboard. Wait for it to fully load before doing anything. On older devices or heavy projects, give it a few extra seconds so all layers render correctly.
Select the Image Layer You Want to Replace
Tap on the image in the canvas to select it, or find its layer in the timeline at the bottom. The layer will highlight when selected. If the image is inside a group, tap the group first, then tap the image layer inside it.
Import the New Image
Before you replace, import the image you want to use. Tap the plus icon to add a new media layer, then select your image from your phone gallery or file storage. It will appear as a new layer in the timeline. You can also long-press your gallery from within Alight Motion’s import panel depending on your version.
Replace the Existing Media
Once you have the new image imported, position it in the timeline at the same point as the original. A clean method I use is to mute or hide the original layer first, then move the new image layer to exactly the same position on the timeline. If the app version you are using shows a “Replace” or “Swap Media” option when you long-press a layer, use that it drops the new image into the existing layer slot while keeping all effects and keyframes attached.
Adjust Size, Position, and Alignment
After the swap, your new image may not be sized or positioned perfectly. Use the Transform tool the move/scale handle on the canvas to resize and reposition. Match it to where the original image was sitting. You can also use X, Y coordinate values in the properties panel for precise alignment.
Preview the Animation Before Saving
Always preview the full animation before you export or save. Tap the play button and watch the entire clip. Look for any sudden jumps, mask mismatches, or effect glitches. It is much easier to fix problems now than after exporting.
Different Ways to Replace Images in Alight Motion
There is more than one way to swap out an image. Depending on what you want to replace it with, here are all the methods.
Replace an Image With a New Picture
This is the most common method. You are literally swapping one photo or PNG for another. Import the new image, use the swap or manual replacement method described above, then resize and reposition. Works great for product photos, logos, portraits, and event photos.
Replace an Image With a Color or Gradient Layer
Sometimes the image slot does not need a picture at all a clean solid color or a gradient works better. Delete the existing image layer and add a Color Fill or Gradient layer in its place. You can match the dimensions of the original image exactly using the same width and height values. This is useful for background elements or placeholder visuals in templates.
Replace an Image With Text
If you want to turn an image slot into a text element, delete the image layer and add a Text layer in the same position. Match the size of the text box to the original image. You can then apply the same effects that were on the image to the text layer manually by noting what effects were applied and reapplying them.
Replace an Image With Shapes and Graphics
Vector shapes and graphics in Alight Motion IOS can replace image layers just as cleanly. Add a Shape layer and resize it to match the original image’s dimensions. This works especially well for icon-style elements or decorative backgrounds where a photo is not necessary.
Replace Images Inside Presets and Templates
XML-based Alight Motion templates sometimes have locked or grouped image layers. To replace inside these, you first need to open the template as a project, locate the image layer (it may be named something like “Image Placeholder”), and then use the manual replacement method. Once replaced, the rest of the template animation works exactly as designed.
How to Replace Images Without Affecting Animations?
This is the part where most people make mistakes in Replace Images in Alight Motion. You replace the image and suddenly the animation looks off. Here is how to avoid that.
Preserve Keyframes and Effects
If you use the manual replacement method (hide old layer, add new one), you need to manually reapply keyframes. A better approach when available is the swap/replace media option that keeps keyframes intact. Always check after replacing whether the keyframe count on the new layer matches what was on the original.
Check Motion Paths and Transform Values
After replacing an image, tap the layer and check the Transform section. Make sure the position, rotation, and scale values are exactly what you expect. If the animation had a motion path keyframed from Point A to Point B, verify the path still makes sense with the new image size.
Fine-Tune the Animation After Replacement
Small adjustments are normal after a replacement. You might need to nudge the image a few pixels to the left, scale it down slightly, or adjust the timing of one keyframe. Do not panic if the first preview is not perfect one or two small tweaks usually gets it right.
Replacing Images Inside Groups and Masked Layers
This is an area that trips up a lot of people, including me the first few times.
Replace Images in Group Layers
To edit inside a group, double-tap the group layer to enter it. You will now see only the layers inside that group on your timeline. Find the image layer, select it, and proceed with the replacement. Tap outside or use the back arrow to exit the group when done.
Replace Images Used With Masks
When an image has a mask applied, the mask defines which part of the image is visible. If you replace the image, the mask shape stays in place but your new image may be positioned differently inside it. After replacing, check the mask alignment by entering the mask layer and adjusting the position of the image relative to the mask boundary.
Review Blend Modes and Effects
Effects like Blur, Glow, Drop Shadow, and blend modes like Multiply or Screen are tied to the layer, not the image content. After replacement, these effects usually stay intact. But always preview to make sure the effect still looks right with the new image. A glow effect that looked great on a white logo might look odd on a dark-colored replacement.
Common Problems During Image Replacement and Their Fixes
These are the issues I have run into personally, and how I fixed them.
Image Appears Blurry
This almost always happens when you import an image that is lower resolution than the original. The app stretches it to fill the same space and it loses sharpness. Fix: use a high-resolution image (at least 1080p or higher) and make sure you are not scaling it up beyond 100% in the Transform settings.
Effects Look Different
If the original image had specific effects that produced a certain look based on the image content, those same effects on a completely different image will produce a different result. This is expected. Go into the Effects panel and adjust values like intensity, color, and opacity until it matches the look you want.
Image Size Does Not Fit Properly
New images with different aspect ratios will not fit the original frame cleanly. Use the Transform tool to resize manually, or enable “Fit to Frame” if your version of Alight Motion supports it. Alternatively, crop your image before importing to match the target aspect ratio.
Animation Looks Misaligned
This usually means the anchor point of the new image is different from the original. Check the anchor point settings in the Transform panel and move it to match the original image’s reference point typically the center for most animations.
Mask Position Changes After Replacement
In Replace Images in Alight Motion, the mask is tied to the layer, not the image. If the image and mask were both positioned at specific coordinates, replacing the image with a differently-sized one will cause a visual mismatch. Go back into the mask layer, adjust the image position inside the mask to recenter it, and preview again.
Pro Tips for Better Image Replacement
These are things I figured out after doing this dozens of times.
Use the Transform Tool Correctly
The Transform tool is your best friend during image replacement. Use it not just for position and scale, but also for rotation and opacity. Double-tap the canvas while a layer is selected to bring up the full transform handle.
Match Colors With Existing Elements
If your project has a specific color palette say all blues and whites make sure your replacement image also fits that palette. You can use the Color Correction effect in Alight Motion to adjust the hue, saturation, and brightness of the new image to match the rest of the project.
Keep Layers Organized
Name every layer. Use a consistent naming convention like “BG_Image_01”, “Logo_Main”, “Product_Photo”. This saves massive amounts of time when you come back to a project after a few weeks or when someone else needs to edit your file.
Use Image Sequencing for Smooth Workflow
If you are replacing multiple images in a template for example, a photo slideshow template do all your imports first, then replace one by one in sequence. This keeps the timeline organized and reduces the chance of mixing up which image goes where.
Preview Changes Before Exporting
This one seems obvious but it is easy to skip when you are in a rush. Always play the full animation from start to finish before exporting. A two-minute preview can save you from a ten-minute re-export.
Advanced Techniques for Professional Editing
Once you are comfortable with the basics, these techniques take your workflow to the next level.
Update Brand Logos Easily
If you manage social media or marketing videos for a brand, build one master template with a clearly labeled logo layer. Each time the client updates their logo, you just swap that one layer. The entire animation adjusts instantly. Keep a folder of correctly-sized logos on your phone for quick access.
Swap Product Images in Promotional Videos
For e-commerce creators who make product videos, this is a massive time-saver. Build one slick product showcase animation, then just swap the product photo for each new product. Export, upload, done. What used to take two hours now takes ten minutes.
Refresh Social Media Graphics
Reels, YouTube Shorts, and TikTok content follows patterns. When you find a format that works, you want to repost that format consistently. Replace the main image and maybe the text overlay, and you have a fresh piece of content that fits a proven format.
Modify XML Templates Efficiently
Downloaded XML templates from Alight Motion communities (like various Telegram groups or YouTube creators) often come with placeholder images. Once you import the XML, locate each image layer and replace with your own content. Knowing this workflow means you can use any template from any source and make it fully your own.
Performance Tips While Replacing Images
Use High-Quality Images
Low-quality images look worse as Alight Motion processes them through effects and exports at higher bitrates. Always start with the highest quality source image you have. PNG is better than JPEG for logos and graphics. JPEG is fine for photos.
Avoid Unnecessary Layers
Every hidden or unused layer still takes up memory. After replacing an image, delete the old layer if you no longer need it. Do not just hide it delete it. This keeps your project file light and prevents sluggish playback.
Optimize Project Performance
If your project has many effects stacked on each layer, replacing images adds another processing step. Work in lower preview quality while editing (there is usually a quality toggle in preview settings) and only switch to full quality for your final preview before export.
Exporting Your Project After Image Replacement
Verify Quality Before Export
Go through each replaced image one more time in the timeline. Tap each one and confirm the correct image is in place. It is easy to accidentally leave the wrong image on a layer when you were switching things around.
Check Resolution and Frame Rate
Make sure your export settings match your project settings. If your project is 1080p at 30fps, export at 1080p at 30fps. Changing export resolution changes how your images are rendered, and a lower export resolution can make your replacement images look blurry even if the source was high quality.
Save and Export the Final Video
Tap the export button, choose your format (MP4 is standard for most platforms), and let it render. After export, play the exported file not the preview to confirm everything looks exactly right. The exported file is the final truth.
Best Practices for Professional Results
Build a personal template library and name everything properly from day one. Always prepare your replacement images before opening the project resize, crop, and color-correct outside of Alight Motion first using your gallery editor or any photo app. Keep your project files backed up to cloud storage.
Use consistent resolution across all your template projects to avoid fitting issues. And most importantly, develop a habit of previewing before exporting one extra minute of preview saves a lot of wasted renders.
Pros and Cons of Replacing Images in Alight Motion
Advantages
Replacing images inside an existing project saves significant editing time compared to rebuilding from scratch. It keeps all your effects, keyframes, and animations perfectly intact. It allows you to build a reusable template library that speeds up your entire content workflow. It works well for team collaboration where one person builds the template and others just update the visuals.
Limitations
The app does not always have a one-tap “replace media” button in all versions, so manual replacement can be tedious in complex projects. If the original image and the replacement image are very different in size or aspect ratio, you will spend extra time adjusting. Replacing images inside deeply nested group layers requires careful navigation. Masked layers need manual realignment after replacement in most cases.
Frequently Asked Questions
Does replacing an image remove keyframes?
If you use the swap or replace media option in Alight Motion, keyframes remain attached to the layer. If you manually delete the old layer and add a new one, keyframes are removed and need to be re-created. Always use the built-in replace option when available.
Can I replace images inside templates?
Yes. Open the template as a project, navigate to the image layer (enter any group layers as needed), and replace using the manual or swap method. All animations and effects tied to that layer will apply to the new image.
What if the new image has a different aspect ratio?
You will need to resize and reposition the new image using the Transform tool to match the original’s layout. Alternatively, crop and resize the image before importing it so the aspect ratio already matches.
Will replacing an image affect video quality?
No, replacing an image does not affect overall video quality. Export quality is controlled by your export settings. However, if your replacement image has lower resolution than the original, it may appear softer or blurrier in the final video.
Can I replace images inside grouped layers?
Yes. Double-tap the group layer to enter it, find the image layer inside, and replace it using the same method. Exit the group when done.
Why does my image appear blurry after replacement?
The replacement image is likely lower resolution than the original, or it is being scaled above 100% in the Transform settings. Use a higher-resolution source image and avoid upscaling beyond the original dimensions.
Can I replace images without changing effects?
Yes, if you use the swap/replace media option when it is available in your app version. The effects stay on the layer and apply to the new image automatically. With manual replacement, you need to reapply effects from scratch.
Conclusion
Replacing images in Alight Motion is one of those skills that seems small but completely changes how fast and efficiently you can work. Once you build your first reusable template and realize you can spin out a new video in under ten minutes by just swapping a few images, you will never go back to rebuilding projects from scratch.
The key things to remember: prepare your images before importing, understand your layer structure before making changes, use the swap option when available to preserve keyframes, and always preview before exporting. Master these habits and you will be producing professional-quality content faster than most editors around you.